15 Pretty Makeup Ideas That Photograph Soft And Flattering
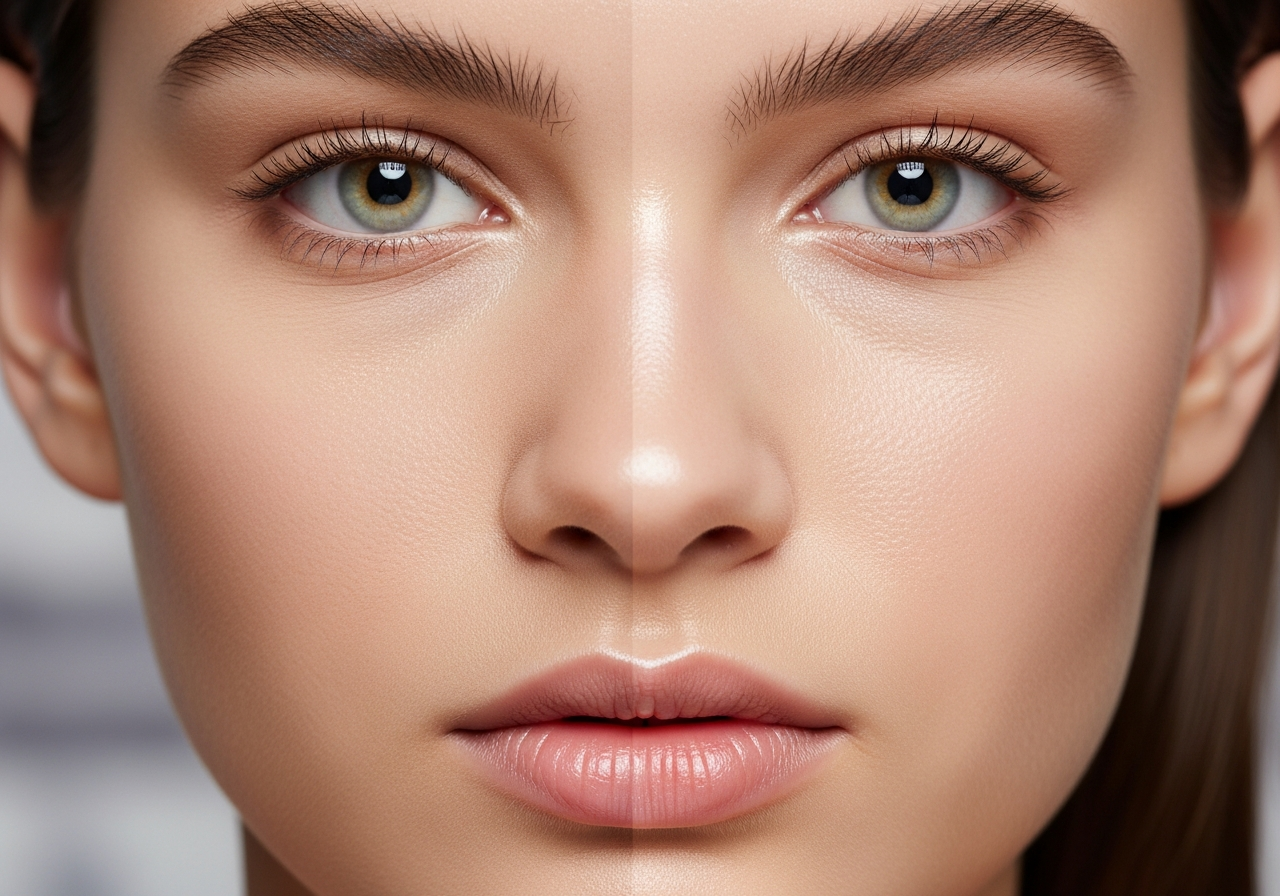
The camera sees things differently than the human eye. What looks stunning in your bathroom mirror might appear washed out or harsh in photographs, leaving you frustrated when reviewing your pictures. Understanding how to create makeup looks that translate beautifully both in person and on camera transforms the way you approach beauty for special occasions, professional headshots, or everyday social media content.
Pretty makeup that photographs well requires strategic product selection, thoughtful application techniques, and an understanding of how light interacts with your features. The goal is not to create a mask but to enhance your natural beauty in a way that remains visible and flattering when captured through a lens. This comprehensive guide explores fifteen makeup ideas designed to help you look soft, radiant, and naturally beautiful in every photograph.
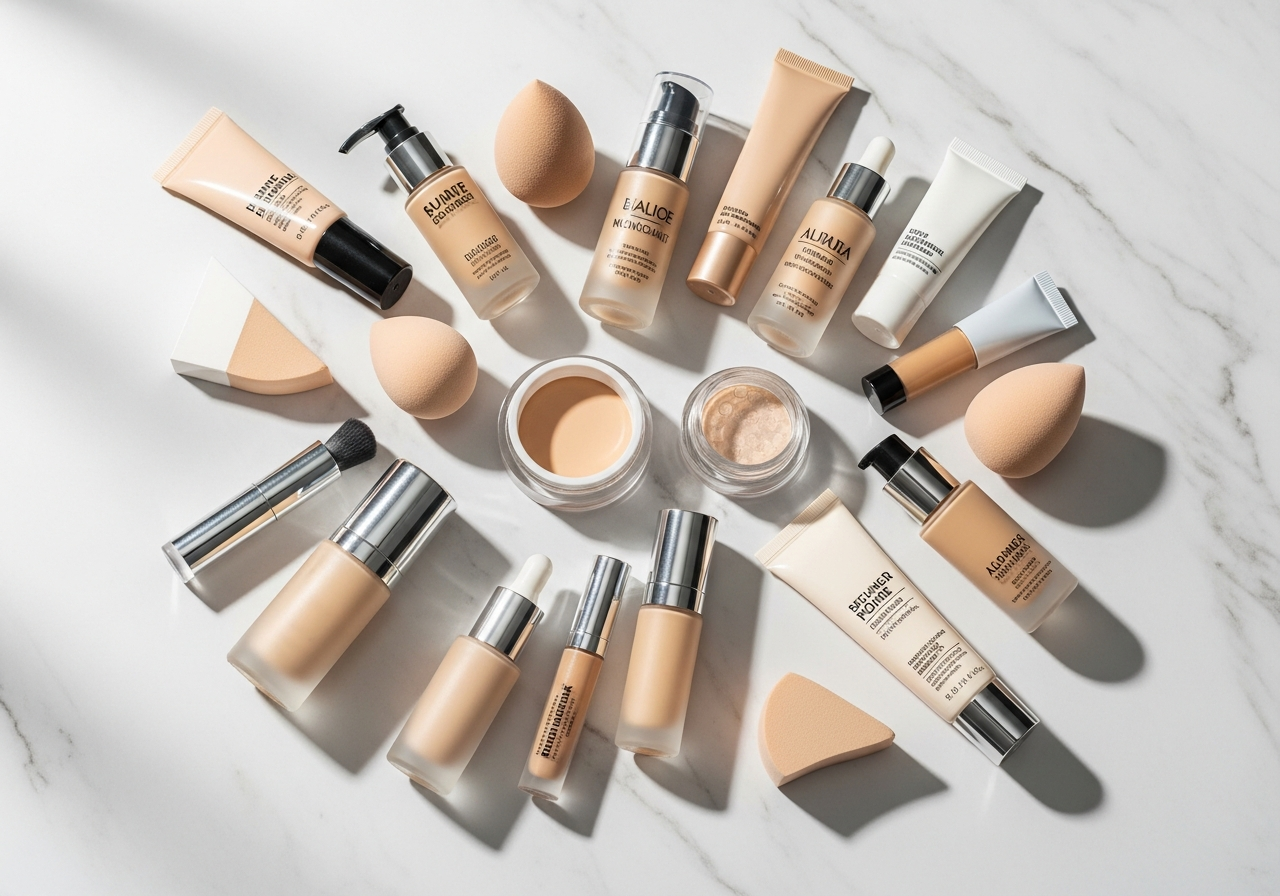
The Foundation of Photogenic Makeup
Creating a flawless base is the cornerstone of any makeup look that photographs beautifully. Your skin preparation and foundation application set the stage for everything that follows.
Perfecting Your Canvas
Begin with thoroughly cleansed and moisturized skin at least thirty minutes before makeup application. Hydrated skin accepts foundation more smoothly and prevents the texture issues that become magnified in photographs. Skip products containing SPF on the day of photography sessions, as mineral ingredients can cause an unwanted ghostly appearance when flash photography is used.
A quality primer addresses your specific skin concerns and creates a smooth surface for foundation. If you struggle with redness, a color-correcting primer neutralizes discoloration before foundation application. Those with dry skin benefit from hydrating primers that create a subtle glow, while oily skin types should opt for mattifying formulas that control shine throughout extended photography sessions.
Choosing the Right Foundation
HD foundations are specifically formulated to photograph well, offering buildable coverage without appearing heavy or cakey on camera. Apply foundation with a damp beauty sponge or dense brush, building coverage gradually in thin layers rather than applying one thick coat. This technique ensures your skin looks natural while providing adequate coverage for photographic purposes.
Blend foundation carefully into your hairline, jawline, and down your neck to avoid visible demarcation lines. The goal is seamless coverage that enhances your complexion without looking obviously made up. Remember that cameras pick up texture and unevenness that might be invisible to the naked eye, making proper blending essential.
Fifteen Pretty Makeup Ideas for Stunning Photos
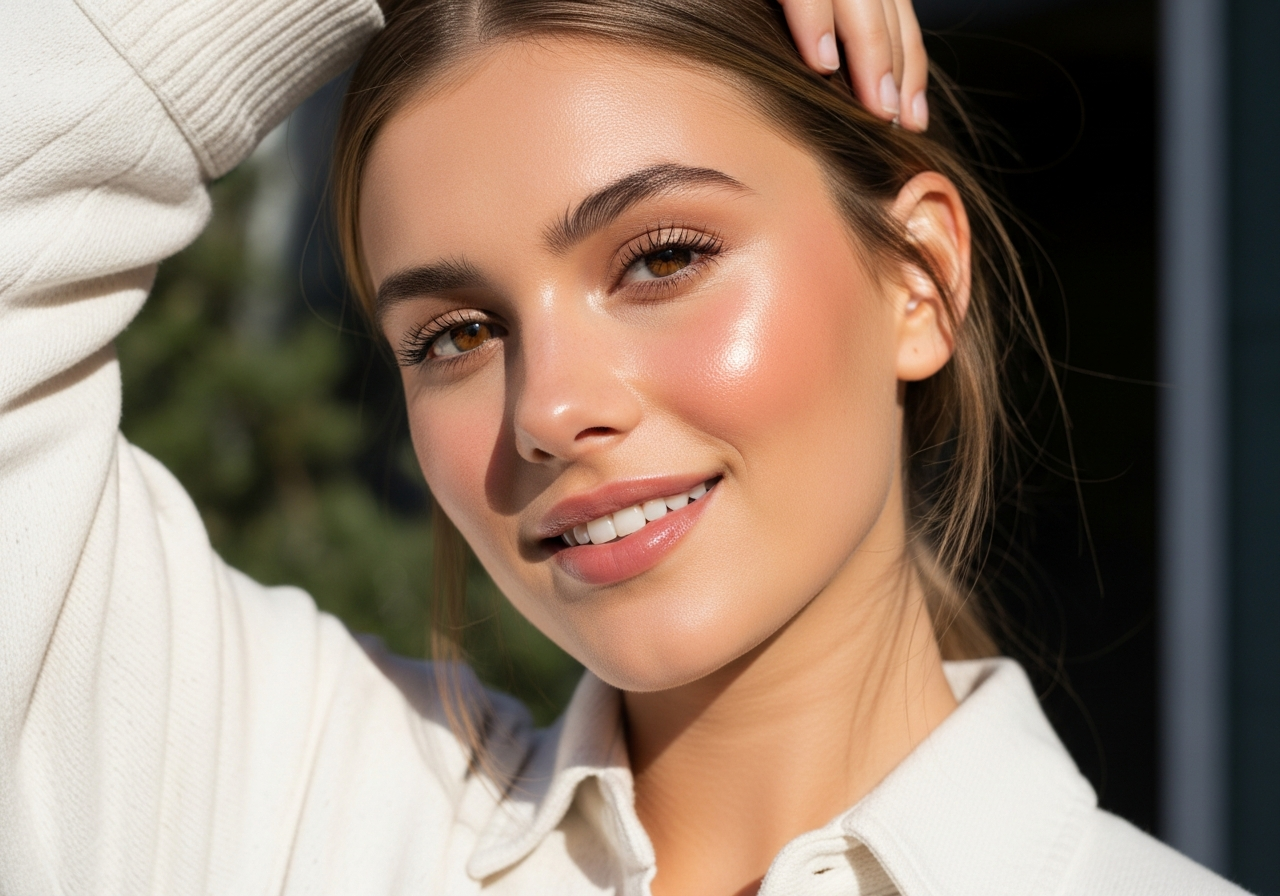
Natural Daytime Glow
This effortlessly beautiful look emphasizes fresh, dewy skin with minimal color. Start with a lightweight tinted moisturizer or sheer foundation, adding concealer only where needed. A cream blush in soft peach or rosy pink gives cheeks a natural flush, while a coat of brown mascara and a nude lip balm complete the look. This makeup idea photographs exceptionally well in natural light and works perfectly for outdoor portraits or casual lifestyle photography.

Soft Romantic Rose
Embrace monochromatic makeup using rose-toned products across your eyes, cheeks, and lips. Apply a matte rose eyeshadow across your lids, blending upward toward the brow bone. Add the same shade to the apples of your cheeks, finishing with a coordinating rose lipstick in a satin finish. This cohesive color story photographs beautifully and creates a harmonious, romantic aesthetic perfect for engagement photos or feminine portraits.
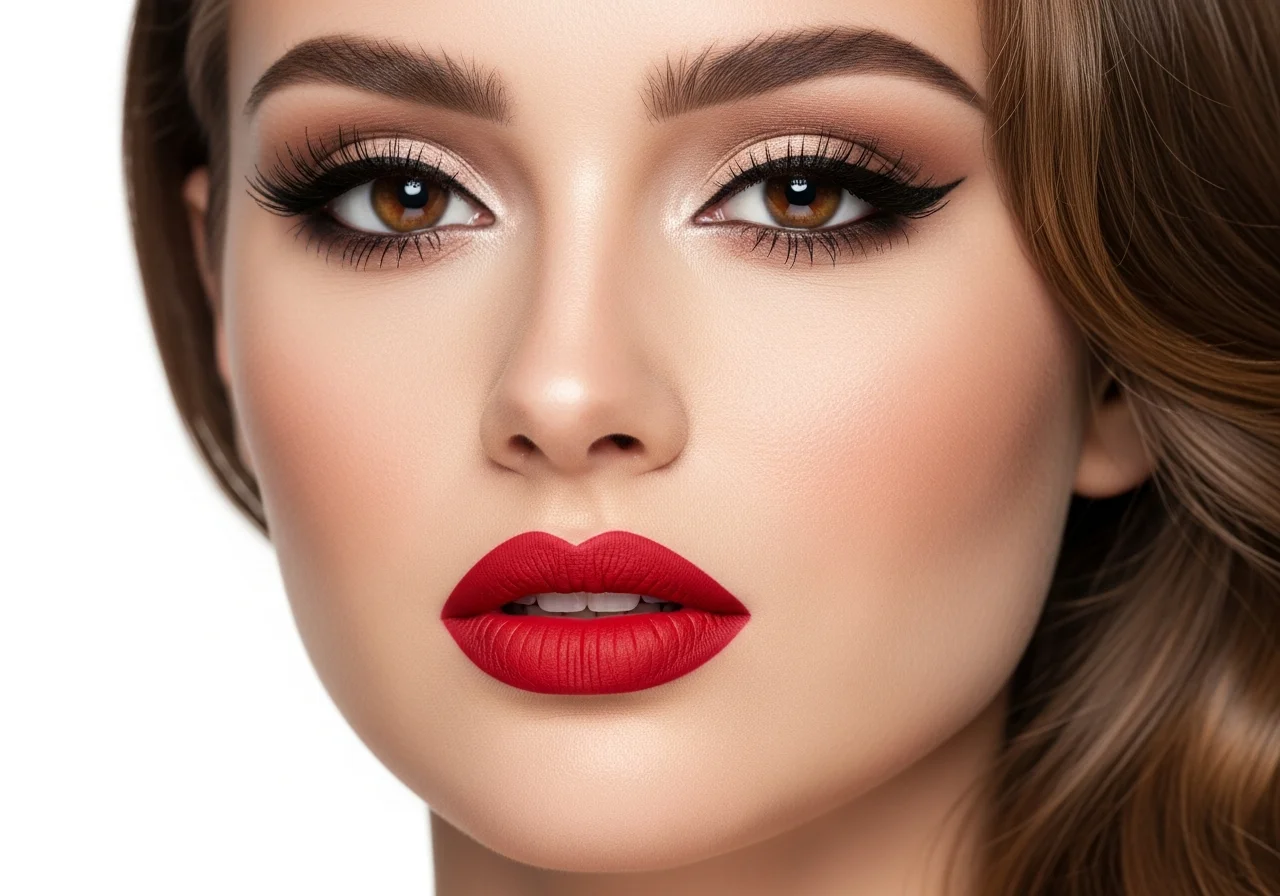
Classic Red Lip Statement
A bold red lip remains timeless in photographs when executed properly. Keep eye makeup simple with neutral browns and plenty of mascara, allowing your lips to take center stage. Line your lips completely with a matching lip liner to prevent feathering and provide staying power. Choose a red with blue undertones if you have cool-toned skin or orange undertones for warm skin tones. The satin finish photographs better than matte or glossy alternatives.
Peachy Keen Warmth
Peachy tones flatter nearly every skin tone and photograph with soft, flattering warmth. Sweep a peachy-bronze shade across your eyelids, add a warm peach blush to the high points of your cheeks, and finish with a peach-nude lip color. This cohesive warm palette creates dimension without appearing heavy, making it ideal for sunny outdoor photography or golden hour sessions.
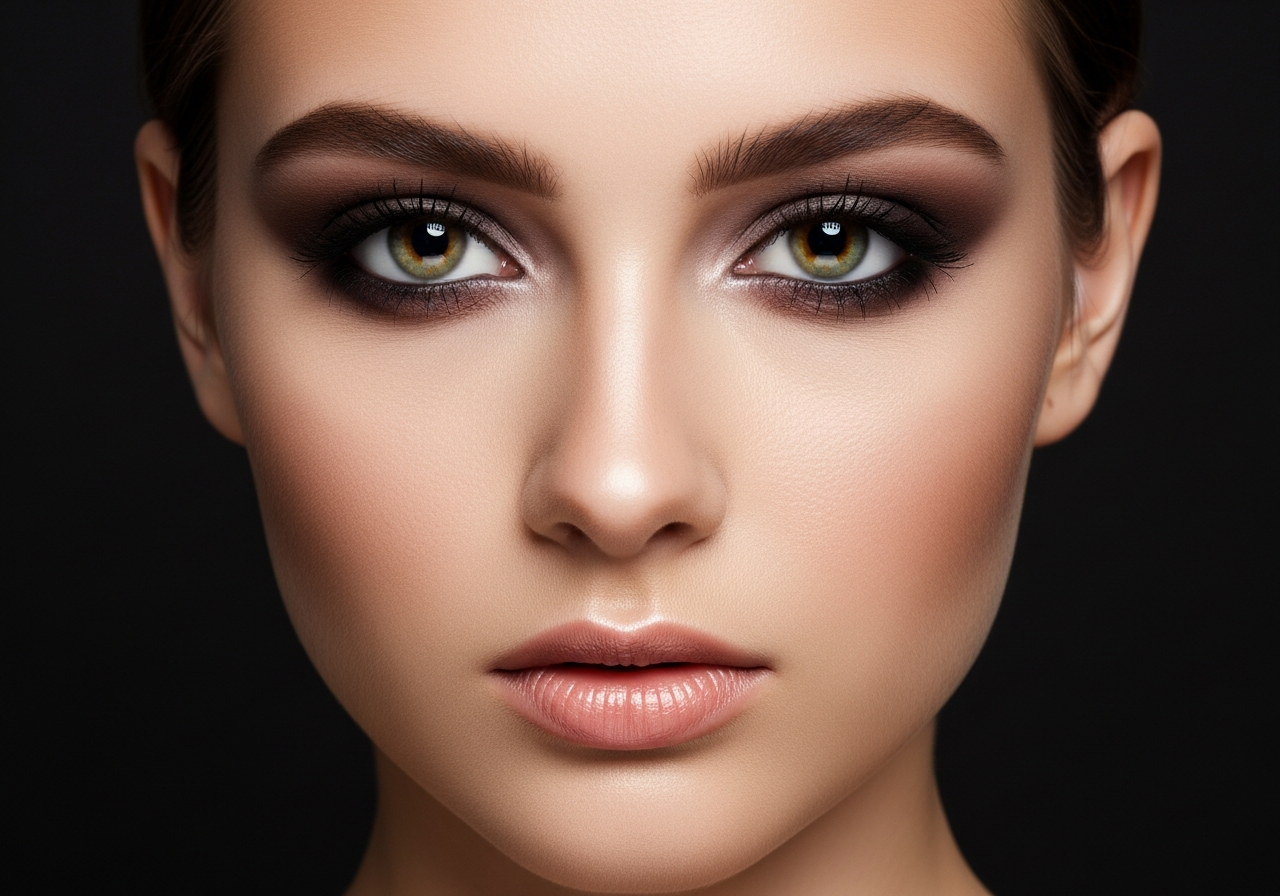
Subtle Smoky Eye
Create depth around your eyes without the harshness of traditional smoky makeup. Use medium-toned taupe and soft brown shadows, building intensity gradually in the outer corner and crease. Keep the inner third of your lid lighter to brighten the eyes. Blend thoroughly to avoid harsh lines, and finish with generous coats of mascara. This approach adds definition that reads beautifully on camera without overwhelming your features.
Fresh Faced with Defined Features
Sometimes the prettiest makeup barely looks like makeup at all. This approach uses strategic contouring and highlighting to enhance your bone structure while maintaining a natural appearance. Apply a light contour beneath cheekbones, along the jawline, and at the temples. Add highlighter to cheekbones, the bridge of your nose, and cupid’s bow. Keep color minimal with just a touch of neutral blush and a your-lips-but-better shade.
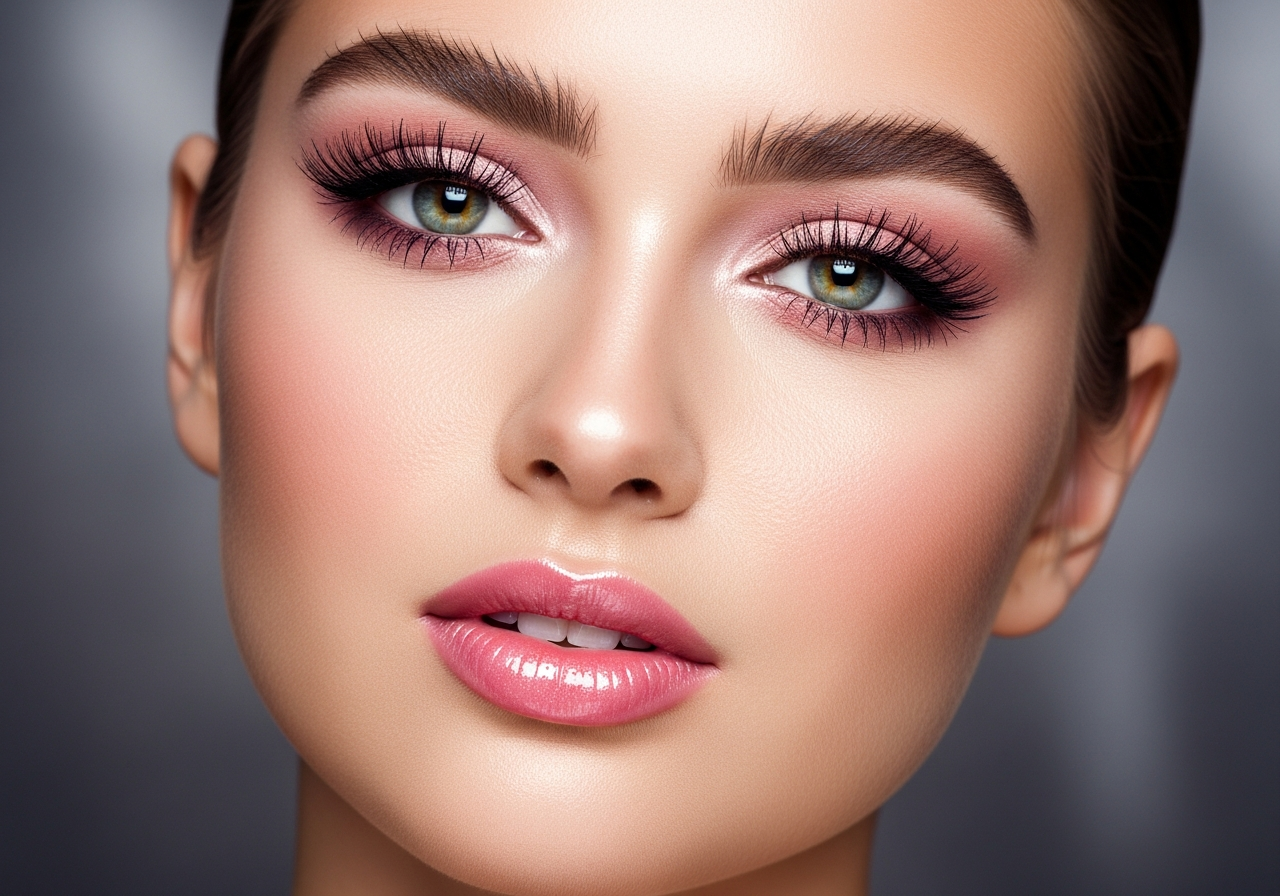
Berry Beautiful
Deep berry tones on lips paired with soft neutral eyes create striking contrast in photographs. This look works particularly well for fall and winter photography. Use warm brown eyeshadows to add subtle definition, keeping the focus on a rich berry lipstick in a formula that provides lasting color without constant reapplication. The depth of berry shades photographs beautifully and adds sophistication to portraits.
Bronzed Goddess
A sun-kissed glow translates gorgeously in photographs when applied with a light hand. Use a matte bronzer to warm the perimeter of your face, focusing on the forehead, cheekbones, and jawline. Add a touch of shimmer to the high points of your face for dimension. Keep eyes neutral with bronze and gold tones, and choose a nude lip with a hint of bronze. This look radiates warmth and vitality in outdoor photography.
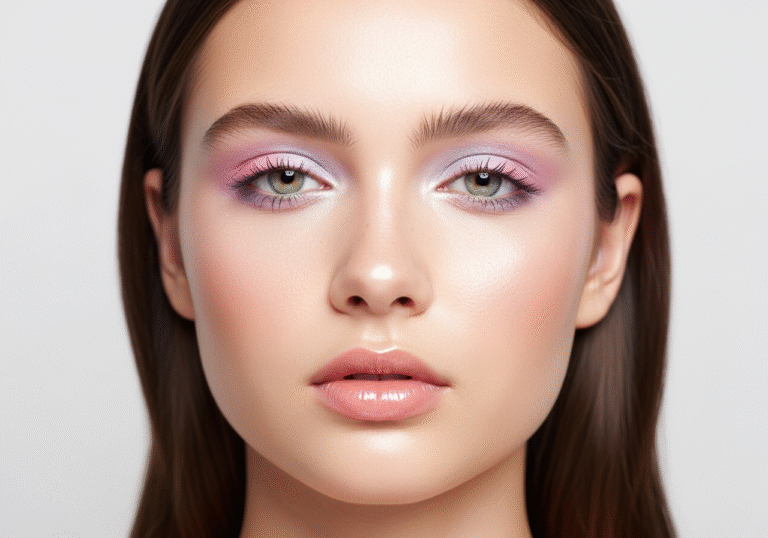
Delicate Pink Perfection
Soft pink tones create an youthful, feminine appearance that photographs with gentle beauty. Apply a light pink eyeshadow across lids, add a coordinating pink blush to the apples of your cheeks, and finish with a pink lipstick in a comfortable formula. This monochromatic approach creates visual harmony while remaining soft and approachable in photographs. The key is choosing pink shades that complement your undertones rather than clash with your natural coloring.
Sophisticated Mauve
Mauve tones offer a perfect middle ground between pink and purple, creating sophisticated elegance in photographs. Use mauve-brown eyeshadows to add depth to your eyes, apply a muted mauve blush to cheeks, and complete the look with a mauve lipstick. This refined color palette photographs with timeless beauty and works across seasons and settings.
Golden Hour Goddess
Capture the magic of golden hour lighting with warm metallic tones. Apply a champagne or gold shimmer to the inner corners of eyes and center of lids, use a warm bronze in the crease, and add a soft gold highlighter to cheekbones. Pair with a nude lip that has golden undertones. This luminous approach mimics the flattering quality of golden hour light and creates radiant photographs.
Coral Crush
Coral occupies the perfect space between pink and orange, offering universal flattery in photographs. A coral lip color becomes the focal point, balanced with neutral eyes enhanced by soft brown liner and mascara. Add a touch of coral blush to cheeks for cohesion. This vibrant yet wearable color choice photographs with beautiful energy and suits both warm and cool undertones when the right shade is selected.
Barely There Beauty
Embrace the no-makeup makeup trend with skin that looks like skin, just perfected. Use minimal foundation, relying instead on strategic concealing and a light dusting of translucent powder where needed. Define brows naturally, add a coat of mascara, and choose a lip color just one shade deeper than your natural tone. This approach photographs with authentic beauty and works beautifully for professional headshots or natural lifestyle photography.
Soft Plum Elegance
Plum tones add drama without harshness, photographing with rich sophistication. Apply plum eyeshadow to lids and outer corners, keeping the look soft with thorough blending. Add a subtle plum-toned blush to cheeks and finish with a plum lipstick in a comfortable formula. This color family adds depth and interest to photographs while maintaining an elegant, refined aesthetic.
Sun Kissed Summer
Capture the essence of summer with bronzed skin, peachy cheeks, and glossy nude lips. Focus on creating a healthy glow through strategic bronzer and highlighter placement. Keep eyes fresh with neutral shadows and defined lashes. Add a peachy-gold blush for warmth and finish with a glossy nude lip that catches light beautifully in photographs. This fresh, luminous look embodies summer beauty.
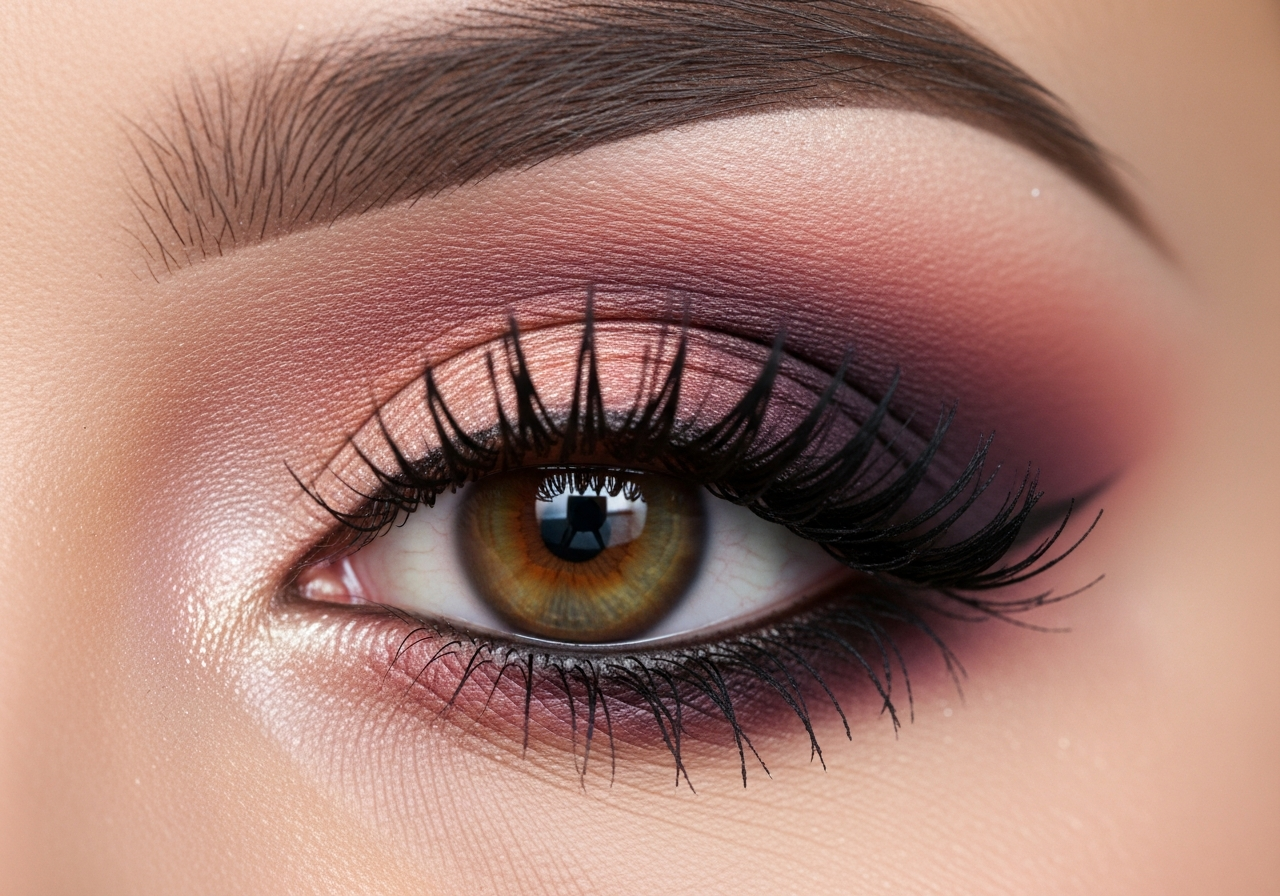
Essential Techniques for Camera-Ready Eyes
Eyes serve as the focal point in most portraits, making eye makeup particularly important for photographic success. The camera tends to flatten features, so eyes need slightly more definition than everyday makeup to maintain their expressiveness.
Creating Depth and Dimension
Layer eyeshadows thoughtfully, building from light to dark. Apply the lightest shade across the entire lid as a base, a medium tone in the crease for definition, and the darkest shade in the outer corner for depth. This graduated application creates dimension that translates beautifully on camera. Blend thoroughly between shades to avoid harsh lines that photograph unfavorably.
Dark eyeshadows in brown or grey often photograph better than stark black, which can appear too harsh or create unflattering contrast. Brown or grey eyeliner also provides definition without the severity of black, particularly for those with lighter coloring.
Mascara and Lashes
Never underestimate the power of well-applied mascara. Two to three coats of quality mascara opens eyes and creates definition that photographs beautifully. If you typically wear only light mascara in daily life, increase application for photography. False lashes can be incorporated for additional drama, but choose wispy, natural-looking styles over heavy, dense strips that can appear obvious in close-up shots.
Curl lashes before mascara application to maximize the eye-opening effect. This simple step makes a significant difference in how awake and bright eyes appear in photographs.

Perfecting Lips for Photography
Lip color often requires more intensity for photographs than everyday wear. Cameras slightly desaturate colors, so what looks bold in person may photograph as subtle.
Lip Preparation and Application
Begin with exfoliated, moisturized lips. Apply lip liner in a shade that matches your chosen lipstick across the entire lip surface, not just the edges. This technique provides a base for color, extends wear time, and prevents feathering. The added pigment ensures lips remain visible and defined in photographs.
Choose lip colors two shades deeper than your natural lip tone for subtle looks, or embrace bolder shades for statement lips. Satin finishes photograph most reliably, offering color payoff without the extremes of matte or high-shine formulas. Matte lipsticks can emphasize texture on the lips, while extreme gloss may create unwanted shine or reflections in certain lighting conditions.
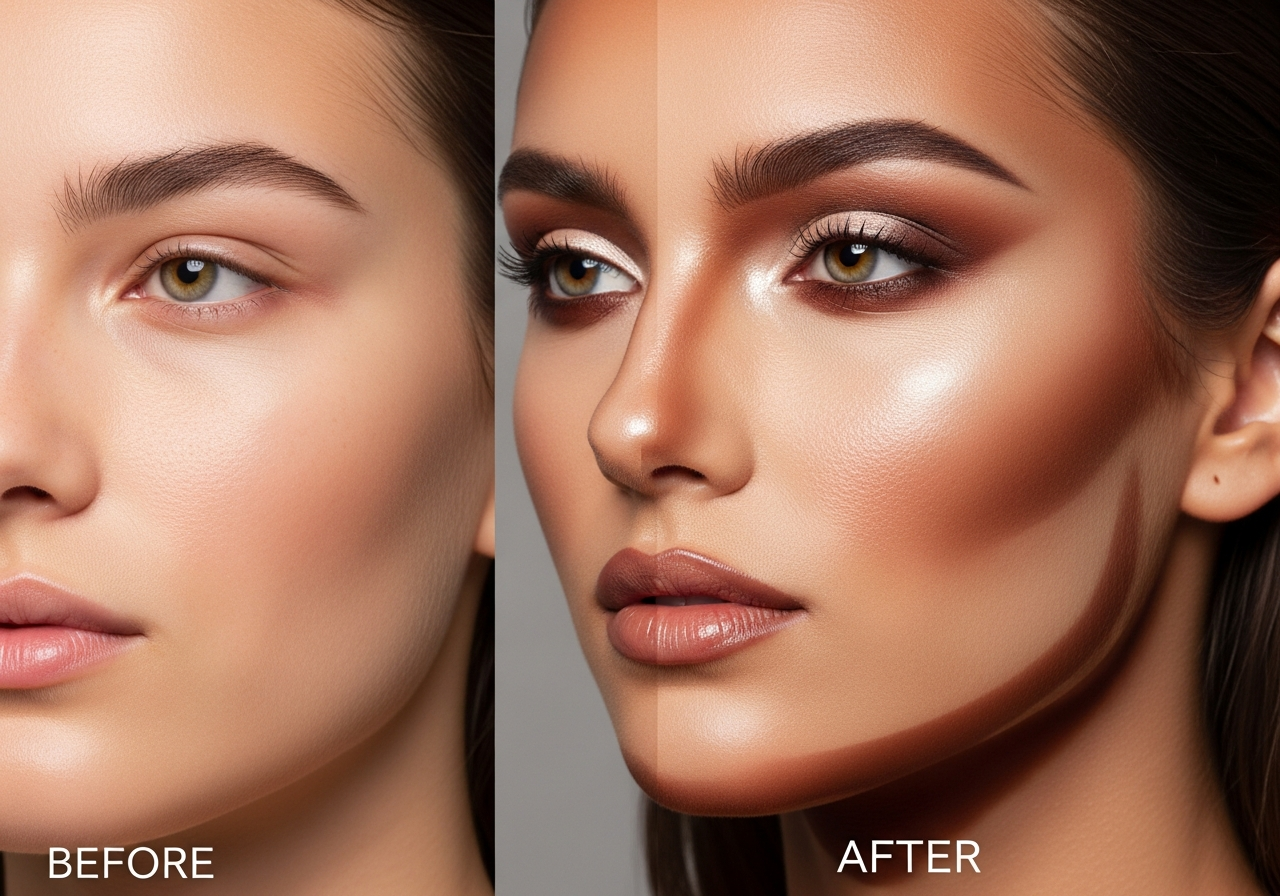
The Art of Contouring and Highlighting
Strategic contouring and highlighting adds dimension that cameras often flatten. This technique should enhance your natural bone structure rather than dramatically reshape your face.
Contouring Fundamentals
Use a contour shade just one or two tones darker than your natural skin tone. Apply with a light hand beneath cheekbones, along the jawline, at temples, and down the sides of the nose if desired. Blend thoroughly until no harsh lines remain. The goal is subtle shadow that defines features without looking obviously sculpted.
Cameras pick up heavy contouring more readily than the human eye, so always blend more than you think necessary. Step back and evaluate your makeup from a distance, as this better mimics how it will appear in photographs.
Highlighting for Dimension
Highlighter brings forward the features you want to emphasize. Apply to the tops of cheekbones, the bridge of the nose, cupid’s bow, and brow bone. Choose highlighters carefully, as some shimmer particles photograph as glitter or create unwanted texture. Cream highlighters often photograph more naturally than powder formulas, creating a subtle luminosity rather than obvious sparkle.
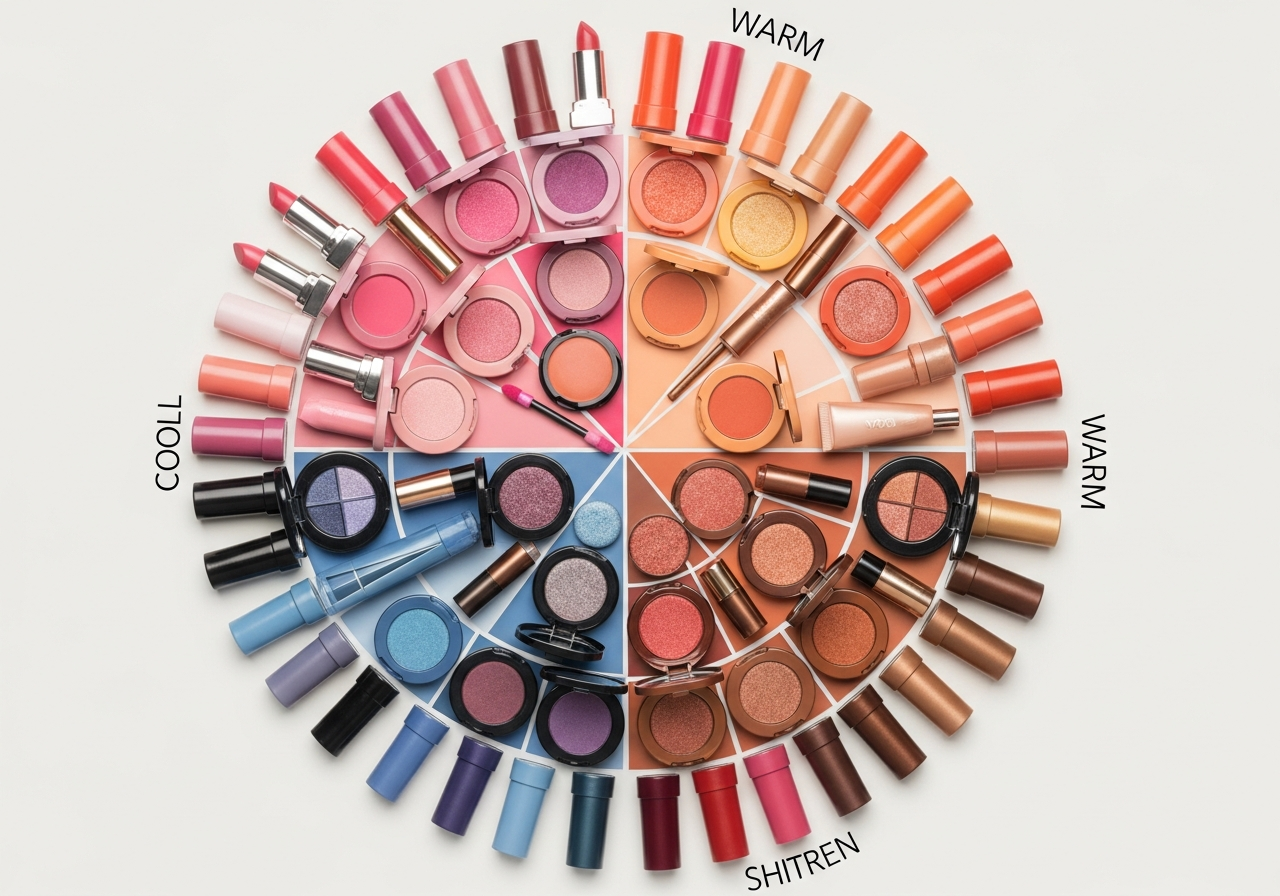
Understanding Color and Tone
Color choices significantly impact how your makeup photographs. Understanding which colors flatter your specific skin tone and photograph well together creates cohesive, beautiful results.
Working with Your Undertones
Cool-toned complexions benefit from pink, rose, berry, and blue-based colors. Warm undertones shine in peach, coral, bronze, and yellow-based shades. Neutral undertones have flexibility to wear both warm and cool colors successfully. Choosing colors that harmonize with your natural undertones ensures makeup looks natural rather than discordant in photographs.
Test makeup in the same type of lighting where you will be photographed when possible. Natural daylight provides the most accurate representation of how colors will appear, but if you are preparing for studio photography with artificial lighting, that environment matters too.
Creating Color Harmony
Monochromatic looks using variations of a single color family photograph with beautiful cohesion. Alternatively, complementary colors can create striking visual interest. Avoid combining too many unrelated colors, as this can appear busy or chaotic in photographs. Simple, thoughtful color choices typically photograph more successfully than complex, multicolor looks.

Setting Your Makeup for Longevity
Makeup that moves, fades, or breaks down during a photography session creates frustration and requires constant touch-ups. Proper setting techniques ensure your look remains fresh and camera-ready.
Strategic Powder Application
Translucent setting powder prevents shine and sets base makeup without adding color or texture. Focus powder application on the T-zone, chin, and any areas prone to oiliness. Avoid over-powdering, which can appear flat or create a dusty appearance in photographs. Other areas of the face can remain slightly dewy for a healthy, luminous look.
HD powders require caution, as some formulas can create flashback in flash photography. Always use these sparingly and ensure thorough blending.
Setting Spray Benefits
A quality setting spray provides an invisible layer that helps makeup last through long photography sessions. Hold the bottle at arm’s length and mist evenly across your entire face. Allow it to dry naturally rather than touching or blotting. This final step can mean the difference between makeup that looks fresh all day and makeup that requires frequent correction.
Managing Shine and Texture
The camera magnifies both shine and texture, making careful attention to these elements essential for flattering photographs.
Controlling Oil
Even if you appreciate a natural glow in person, some mattifying is necessary for photography. Oil creates hotspots that reflect light unfavorably in photographs, particularly with flash. Keep blotting papers accessible throughout photography sessions to remove excess oil without disturbing makeup. A light dusting of translucent powder can also control shine that develops during extended sessions.
Minimizing Texture
Cameras reveal skin texture, including dry patches, enlarged pores, and fine lines. Thorough moisturizing before makeup application minimizes texture issues. Apply foundation with patting or stippling motions rather than rubbing, as this technique provides coverage without emphasizing texture. Using a beauty sponge dampened slightly with setting spray can smooth foundation and reduce the appearance of texture.
Lighting Considerations
Understanding lighting helps you adjust your makeup accordingly. Different lighting conditions require slight modifications to your makeup application.
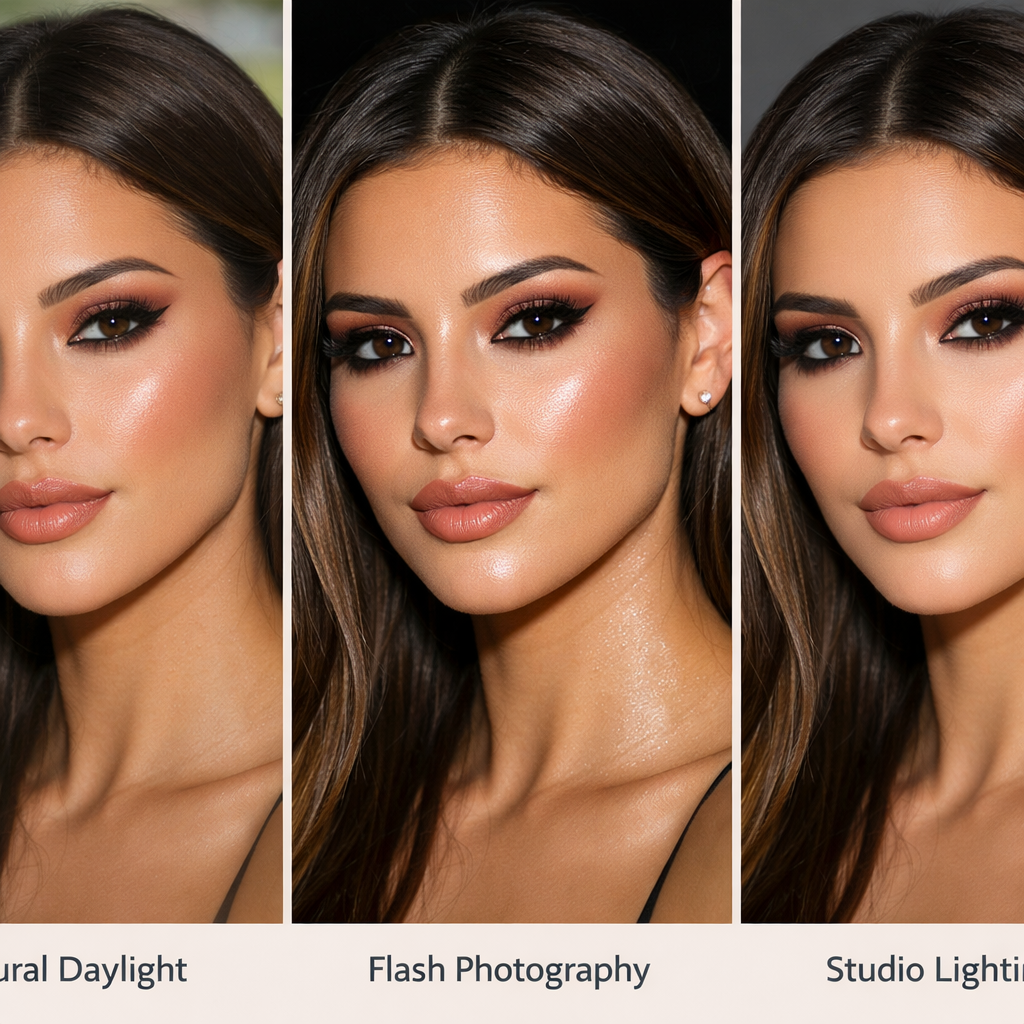
Natural Light Photography
Natural light is forgiving and requires less intense makeup. Focus on creating fresh, healthy-looking skin with subtle enhancement. Colors appear most true to life in natural light, so this is an excellent environment for softer, more natural makeup looks.
Flash Photography
Flash tends to flatten features and can wash out color. When you know flash will be used, slightly intensify your makeup. Add more blush than usual, use slightly deeper lip colors, and ensure eyes have adequate definition. Avoid products containing SPF or light-reflecting particles that cause ghosting in flash photography.
Studio and Artificial Lighting
Professional studio lighting can be quite bright, requiring makeup with more coverage and definition than everyday wear. Contouring becomes particularly important under studio lights to maintain facial dimension. Consult with your photographer about their lighting setup when possible, as this information helps you prepare appropriate makeup.
Common Mistakes to Avoid
Learning what not to do is just as important as mastering proper techniques. Avoiding these common pitfalls ensures consistently beautiful results.
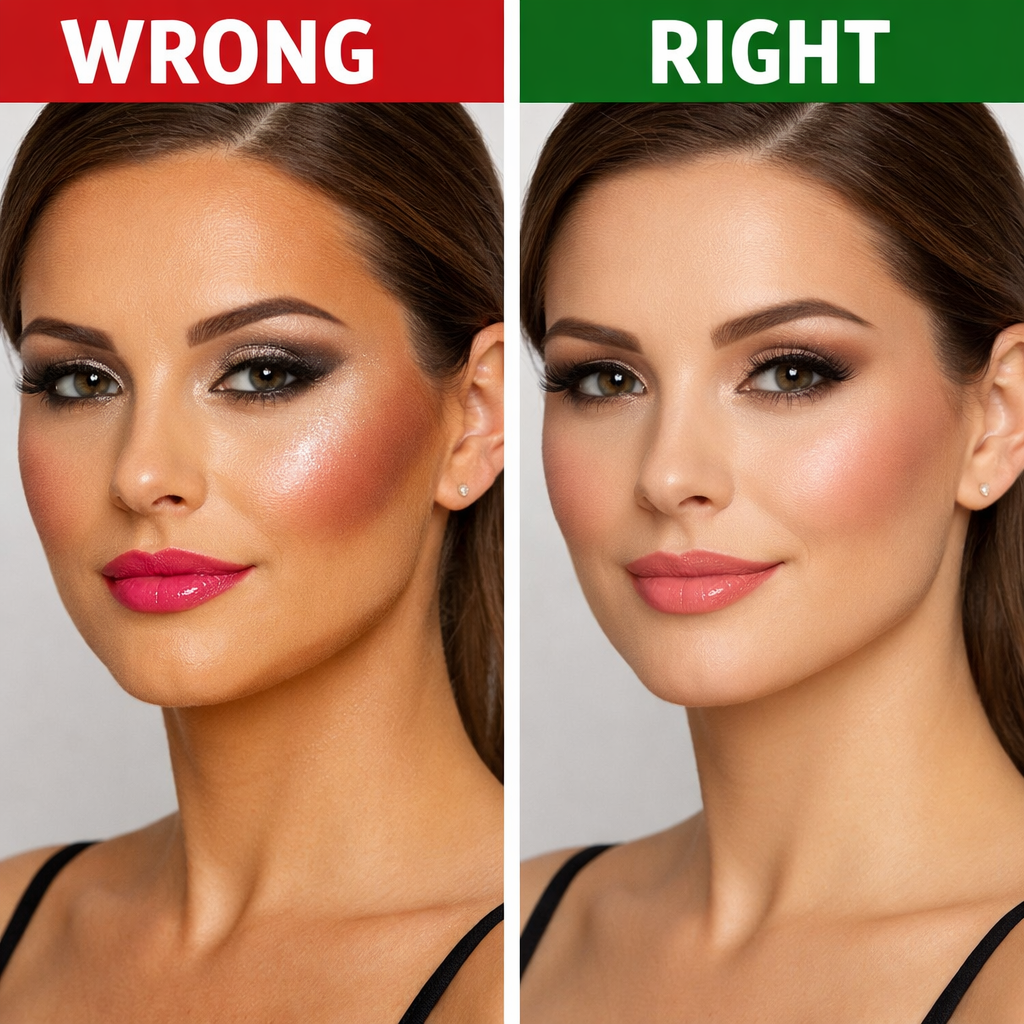
Shimmer Overload
While a touch of strategic shimmer adds dimension, excessive shimmer or glitter can translate to greasiness in photographs. Reserve shimmer for small, specific areas like the inner corner of eyes or the tops of cheekbones. Keep the rest of your makeup matte or satin.
Matching Foundation to Your Face Instead of Your Neck
A perfectly matched foundation should disappear into your skin. Always test foundation against both your face and neck in natural light. An incorrect match creates an obvious mask-like appearance in photographs.
Forgetting to Blend
Harsh lines and unblended edges become glaringly obvious in photographs. Take extra time to blend every element of your makeup, from foundation edges to eyeshadow transitions to contour application. When you think you have blended enough, blend a bit more.
Overdoing Trends
While trendy makeup can be fun, extreme trends often do not photograph as beautifully as classic, refined techniques. Consider your end goal and the timelessness you want your photographs to have when choosing whether to incorporate current trends.
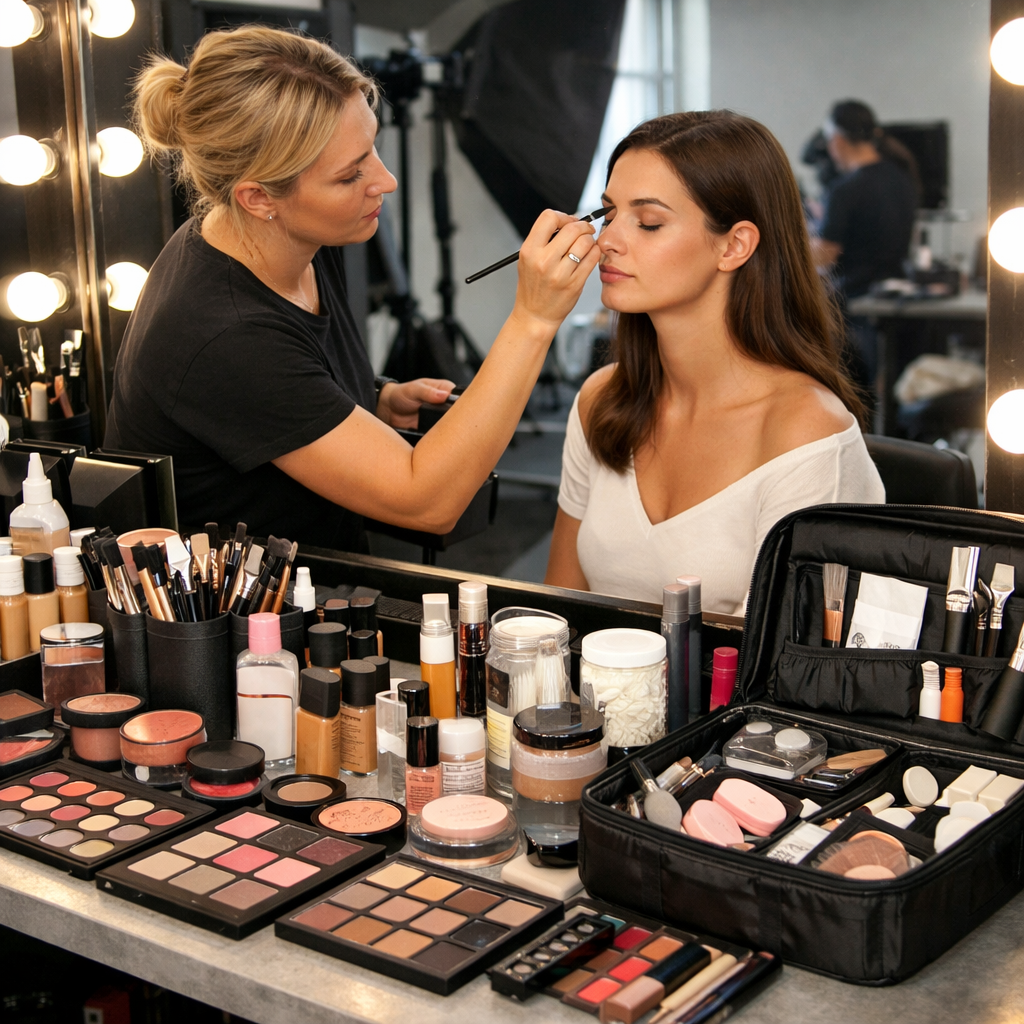
Preparing for Your Photography Session
Proper preparation ensures you look and feel your best when it is time to face the camera.
Timeline and Practice
Never try a completely new makeup look on the day of important photographs. Practice beforehand, taking test photos with similar lighting to evaluate how your makeup translates on camera. This preparation allows you to adjust application, color choices, or intensity before the actual session.
Begin your makeup routine at least ninety minutes before photography begins. This timeline allows products to set properly and gives you time to make any necessary adjustments without rushing.
Bringing Touch-Up Essentials
Even perfectly applied makeup may need minor touch-ups during extended sessions. Pack blotting papers, translucent powder, your lip color, and any other products you might need for quick corrections. A small mirror allows you to check your makeup between shots and address any issues promptly.
Staying Comfortable
Makeup that makes you feel uncomfortable will show in your photographs. Choose formulas that feel good on your skin and colors that make you feel confident. Your genuine confidence and comfort will translate to more natural, beautiful expressions in your photographs.
Conclusion
Creating pretty makeup that photographs soft and flattering requires understanding the unique relationship between cosmetics, lighting, and camera lenses. The fifteen makeup ideas presented offer versatile options for different styles, occasions, and personal preferences. Remember that the most beautiful makeup enhances rather than masks, creating a polished version of your authentic self.
Start with a flawless base, choose colors that complement your natural undertones, add dimension through strategic contouring and highlighting, and set everything properly for longevity. Pay special attention to eyes and lips, as these features serve as focal points in most photographs. Consider your lighting conditions and adjust your makeup intensity accordingly.
With practice and attention to these principles, you will develop an intuitive understanding of what works best for your unique features and photography needs. The goal is not perfection but rather the confidence to face the camera knowing your makeup will translate beautifully in every photograph. Embrace these techniques, adapt them to your personal style, and watch as your photographs capture the soft, flattering beauty you see in the mirror.
Frequently Asked Questions
What is the biggest difference between everyday makeup and makeup for photos?
Makeup for photographs generally requires slightly more intensity and definition than everyday wear because cameras tend to flatten features and slightly desaturate colors. You need more coverage in your base makeup, additional definition around the eyes, and slightly deeper lip colors to ensure everything remains visible on camera. However, this does not mean heavy makeup. The key is strategic enhancement that translates well through a lens while still looking natural in person.
Should I avoid all shimmer products when being photographed?
Not necessarily. Strategic shimmer application can add beautiful dimension to photographs when used sparingly on specific areas like the tops of cheekbones, inner corners of eyes, or brow bones. The issue arises when shimmer is applied too liberally across the face, as this can photograph as excessive shine or greasiness. Avoid shimmer on the center of your face, particularly the forehead, nose, and chin, where it may create unwanted hotspots in photographs. Choose finely-milled shimmer products rather than chunky glitter for the most flattering results.
How do I choose the right foundation shade for photographs?
Select foundation by testing it in natural daylight on both your jawline and neck rather than your hand or wrist. The correct shade should disappear seamlessly into your skin without any visible line of demarcation. For photography, you may want to match your foundation slightly more to your neck than your face to avoid the mask effect that can occur in photographs. Consider HD foundation formulas specifically designed to photograph well, and always blend foundation down onto your neck for a seamless transition.
Why do some makeup looks that appear beautiful in person photograph poorly?
This disconnect happens because cameras process light, color, and dimension differently than human eyes. Cameras can flatten three-dimensional features, slightly desaturate colors, magnify texture and shine, and create unexpected effects with certain ingredients like SPF or light-reflecting particles. What appears subtly glowing in person may photograph as oily, while colors that look vibrant to your eye might appear washed out on camera. Understanding these differences allows you to adjust your makeup application to work with the camera rather than against it.
How much time before a photoshoot should I apply my makeup?
Plan to complete your makeup at least 30 to 45 minutes before photography begins. This timing allows your products to settle into your skin, oils from your face to be absorbed by powder products, and any initial shine to be controlled. It also provides a buffer for any necessary touch-ups or adjustments after you see how everything looks together. For important sessions, many people find that applying makeup 60 to 90 minutes in advance provides the most polished, settled appearance on camera.