

15 Gingerbread House Recipes for Styling and Photography Guide
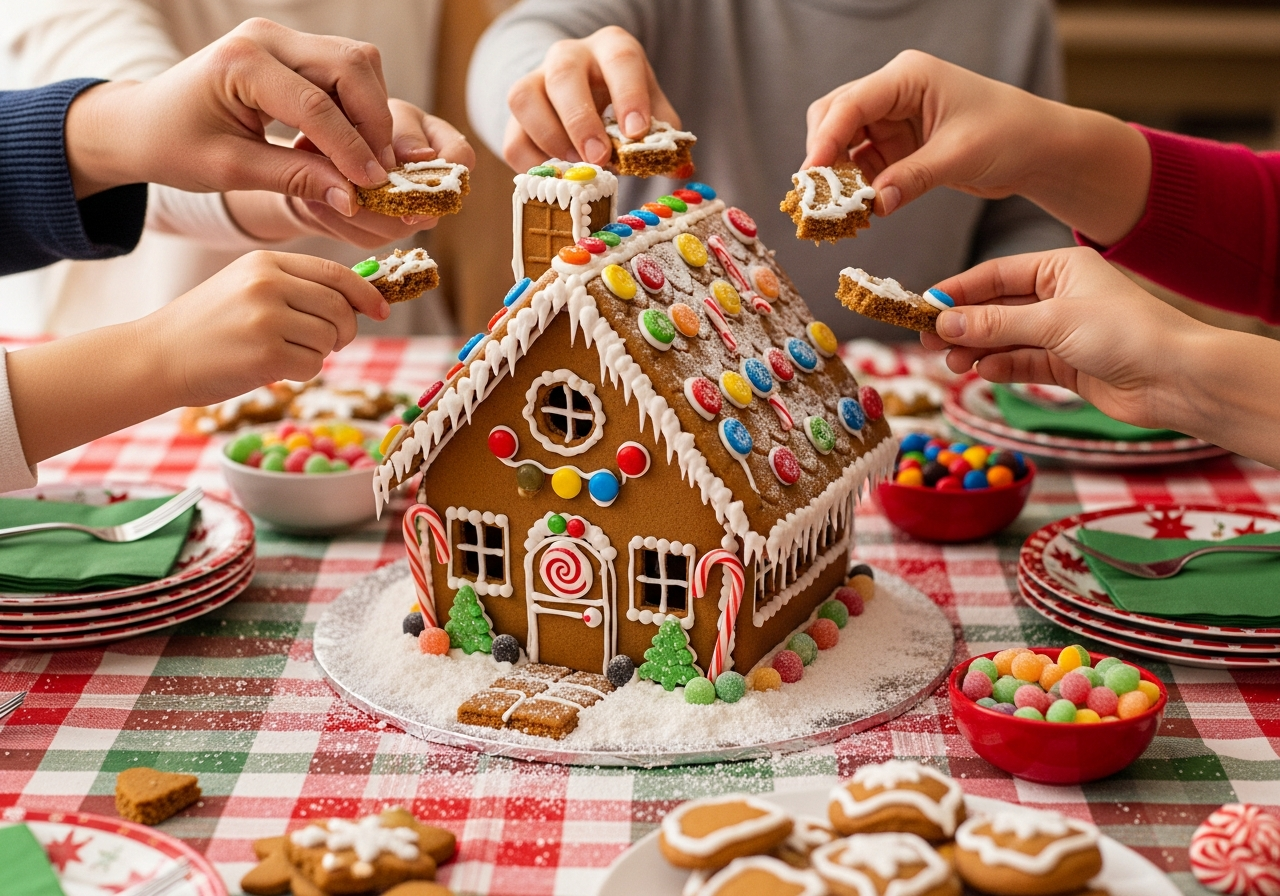
Creating a gingerbread house represents more than just a holiday baking project. It transforms your kitchen into a creative studio where architectural design meets culinary artistry. Whether you plan to photograph your creation for social media, display it as a seasonal centerpiece, or simply enjoy the process with family, understanding the fundamentals of construction Gingerbread House and presentation techniques will elevate your results from ordinary to extraordinary.
This comprehensive guide explores fifteen distinct gingerbread house recipes tailored for various skill levels, styling preferences, and photographic purposes. Each recipe addresses specific construction needs while offering unique flavor profiles and visual characteristics that photograph beautifully. Beyond the recipes themselves, you will discover professional techniques for assembling, decorating, and capturing your Gingerbread House creations in ways that showcase your craftsmanship.
Understanding Construction Gingerbread House Fundamentals
The distinction between regular gingerbread cookies and construction-grade gingerbread proves essential for successful house building. Traditional gingerbread cookies prioritize tender texture and rich spice flavor, making them unsuitable for architectural projects. Construction gingerbread sacrifices some palatability for structural integrity, creating firm walls that resist sagging and crumbling under the weight of decorations.
The foundation of any construction Gingerbread House involves specific ingredient ratios. Higher flour content creates strength, while reduced butter or substituted shortening prevents excessive spreading during baking. Molasses serves dual purposes, providing both the characteristic dark color that photographs dramatically and binding properties that enhance durability. The dough requires thorough mixing to develop gluten structure, contrary to typical cookie-making advice about minimal handling.
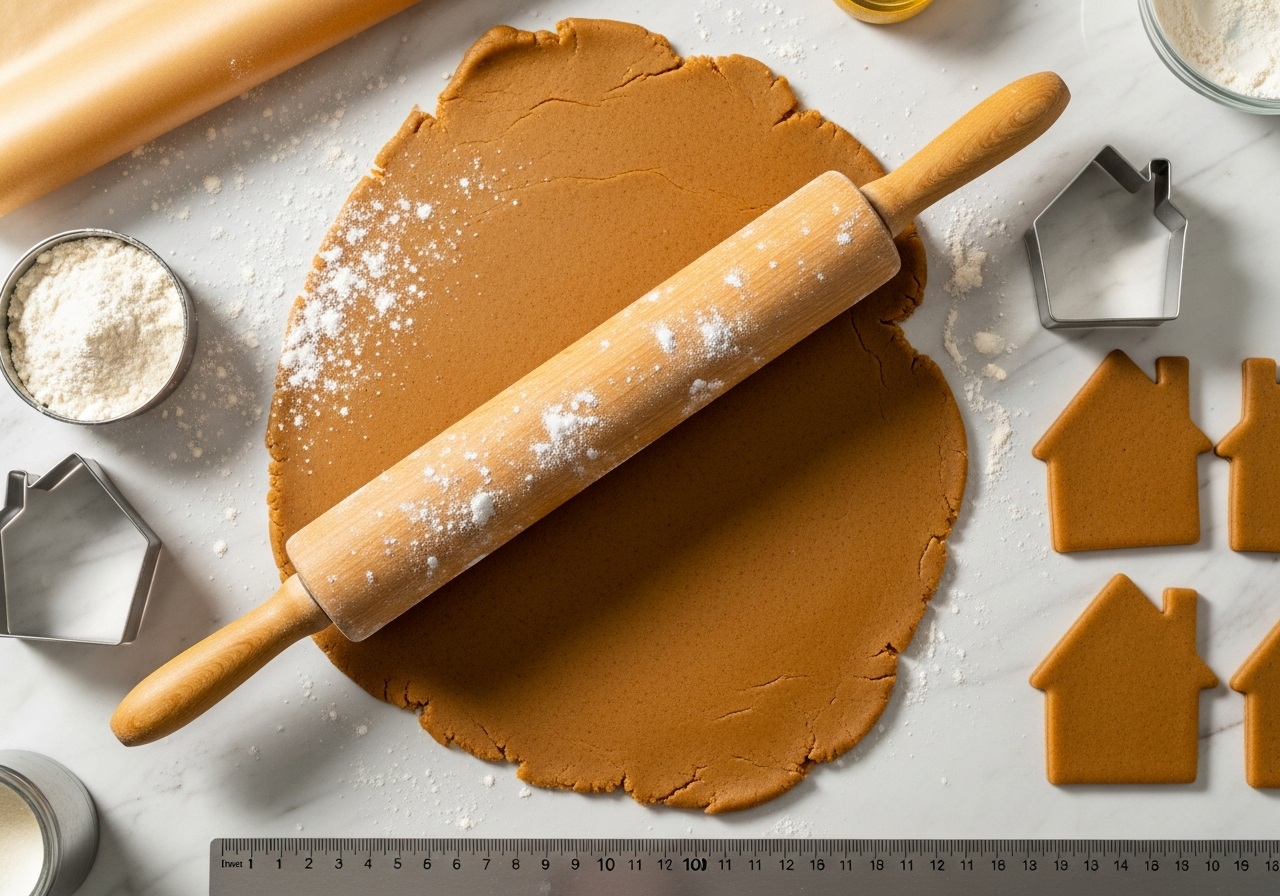
Proper dough temperature matters significantly for both cutting and baking. Chilling the dough for at least three hours, or preferably overnight, firms the fat content and makes rolling easier. Some bakers freeze rolled dough sheets before cutting, which produces exceptionally clean edges. Room temperature dough spreads unpredictably during baking, distorting the precise measurements necessary for proper house assembly.
Classic Strong-Structure Recipe
This traditional recipe produces walls capable of supporting elaborate decorations and lasting several weeks on display. The formula emphasizes structural soundness while maintaining enough flavor to remain edible if desired.
Combine three-quarters cup of shortening with three-quarters cup of packed brown sugar, beating until light. Add one cup of unsulphured molasses and mix thoroughly. In a separate bowl, whisk together five cups of all-purpose flour, one and a half teaspoons of baking soda, one tablespoon of ground ginger, two teaspoons of ground cinnamon, one teaspoon of ground cloves, and one teaspoon of salt.
Gradually incorporate the dry ingredients into the wet mixture, adding one egg to help bind everything together. The resulting dough should feel firm and slightly dry. Divide into four portions, wrap tightly, and refrigerate for at least four hours. This recipe yields enough dough for one large house or two medium structures.
Roll each portion between parchment sheets to quarter-inch thickness. Maintaining consistent thickness across all pieces ensures even baking and proper fit during assembly. Cut your shapes while the dough remains cold, transfer the entire parchment sheet to a baking sheet, and bake at 350 degrees Fahrenheit for twelve to fifteen minutes until the edges darken slightly. The Gingerbread House should feel firm when pressed gently.
Honey-Based Alternative Recipe
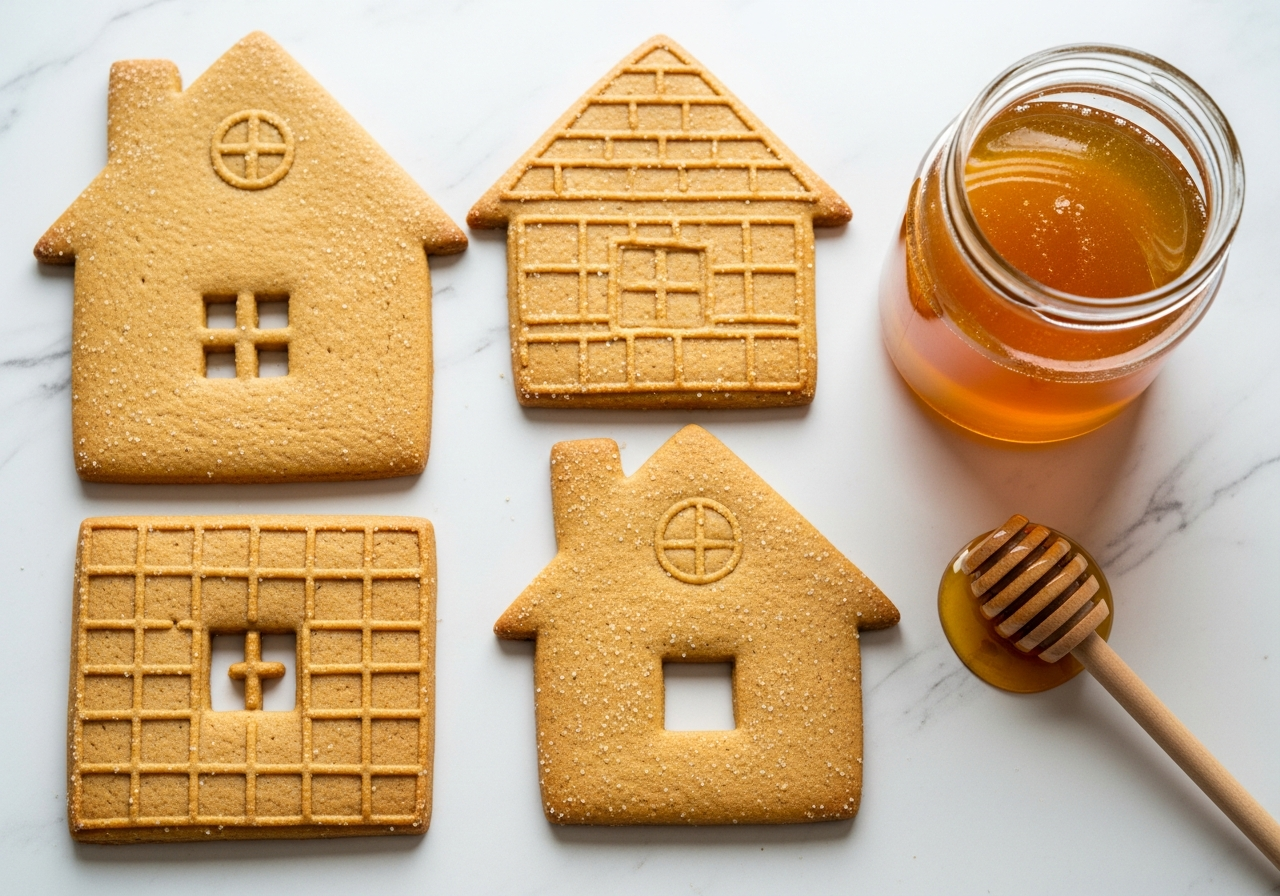
For those avoiding corn syrup or seeking a lighter flavor profile, honey substitutes beautifully for molasses while maintaining necessary binding properties. This variation photographs with golden-brown tones rather than deep mahogany.
Cream three-quarters cup of butter with one cup of granulated sugar until fluffy. Blend in three-quarters cup of honey and one beaten egg. Mix four cups of flour with two teaspoons of baking soda, one tablespoon of ground ginger, one teaspoon of cinnamon, and half a teaspoon of salt. Combine wet and dry ingredients until a cohesive dough forms.
This dough requires firmer chilling because honey retains more moisture than molasses. Refrigerate for at least six hours before rolling. The lighter color makes piped decorations stand out dramatically in photographs, particularly when using contrasting royal icing colors.
Bake at 325 degrees Fahrenheit for slightly longer than traditional gingerbread, approximately fifteen to eighteen minutes. The lower temperature prevents honey from caramelizing too quickly while ensuring thorough drying. Cool completely before handling, as honey-based gingerbread remains softer when warm.
Dark Chocolate Gingerbread Recipe
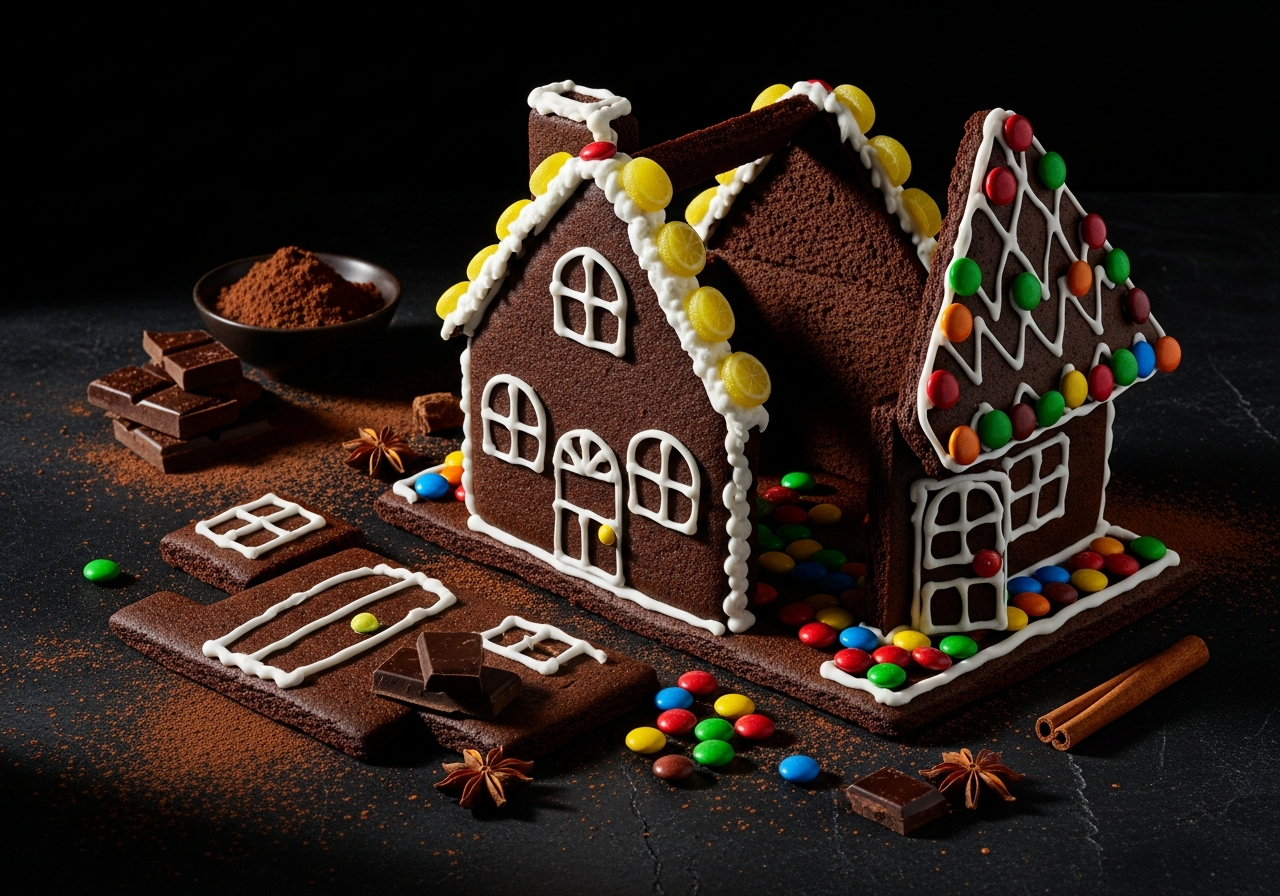
Adding cocoa powder creates a sophisticated, almost black Gingerbread House that provides stunning contrast for white royal icing and colorful candies. This recipe appeals to chocolate lovers while maintaining necessary structural properties.
Beat one cup of butter with one cup of brown sugar. Mix in one cup of molasses and two eggs. Sift together four and a half cups of flour, half a cup of unsweetened cocoa powder, two teaspoons of baking soda, one tablespoon of ginger, two teaspoons of cinnamon, one teaspoon of cloves, and one teaspoon of salt. Combine thoroughly and chill overnight.
The cocoa intensifies the color and adds subtle chocolate notes that complement traditional ginger spices. Roll to three-eighths inch thickness for extra strength. The darker color hides imperfections and creates dramatic shadows in photography, particularly when using side lighting to emphasize texture and dimension.
Temperature control becomes especially critical with chocolate gingerbread. Overbaking produces bitterness, while underbaking leaves walls too soft. Watch for the surface to appear dry and the edges to pull slightly from the parchment. Cool pieces completely on the baking sheet to prevent warping.
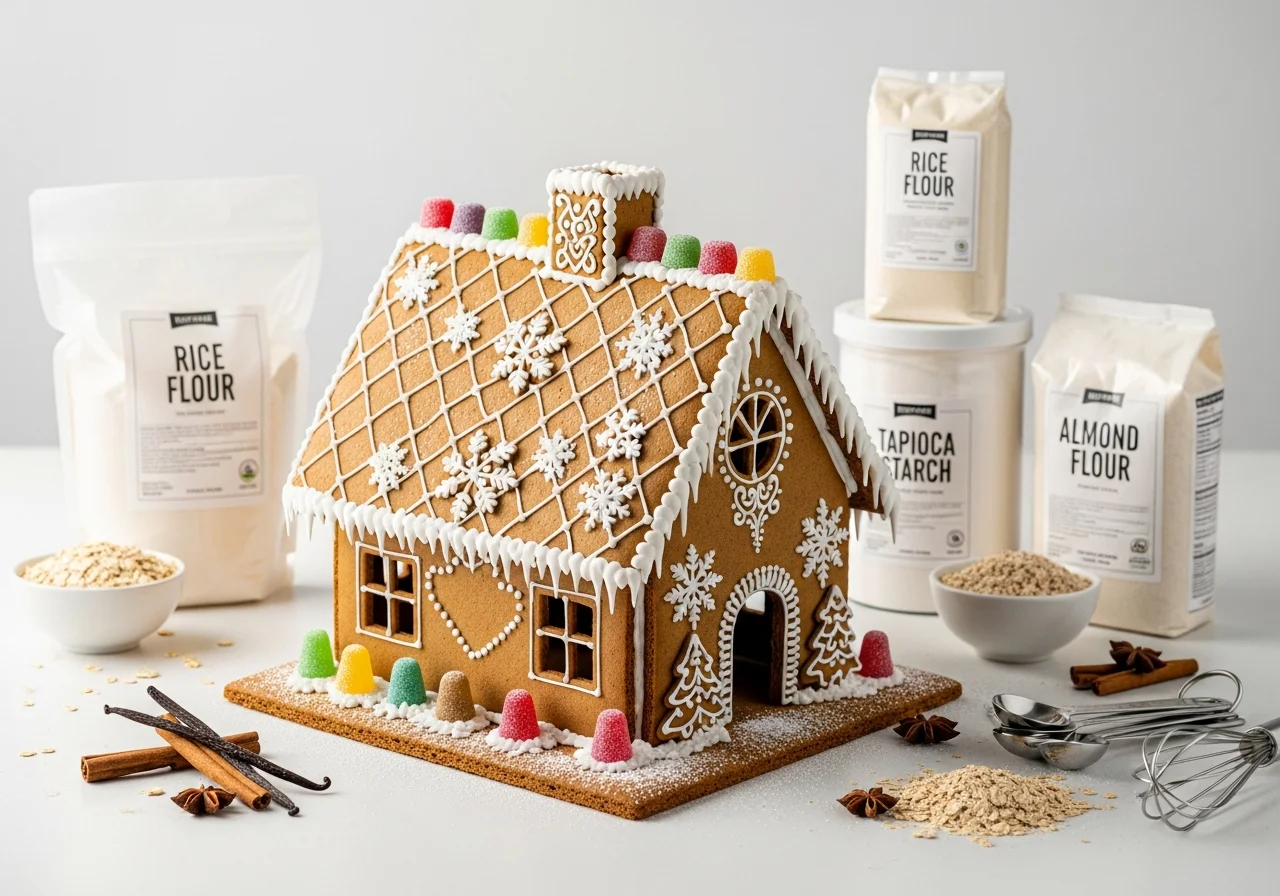
Gluten-Free Construction Recipe
Creating a sturdy gluten-free Gingerbread House requires careful flour selection and additional binding agents. This recipe uses a blend approach for best results.
Mix two cups of rice flour, one cup of tapioca starch, one cup of potato starch, two teaspoons of xanthan gum, one tablespoon of ginger, two teaspoons of cinnamon, one teaspoon of cloves, two teaspoons of baking soda, and one teaspoon of salt. In a separate bowl, cream one cup of butter with one cup of brown sugar, then add one cup of molasses and two eggs.
Combine wet and dry ingredients gradually. The dough will feel different from wheat-based versions, slightly more crumbly initially. Press it together firmly and refrigerate for at least eight hours. The extended chilling allows the starches to fully hydrate.
Roll between parchment sheets to half-inch thickness, slightly thicker than traditional recipes to compensate for the different structural properties. Bake at 325 degrees Fahrenheit for eighteen to twenty minutes. Gluten-free gingerbread becomes exceptionally hard when fully cooled, creating extremely durable houses.
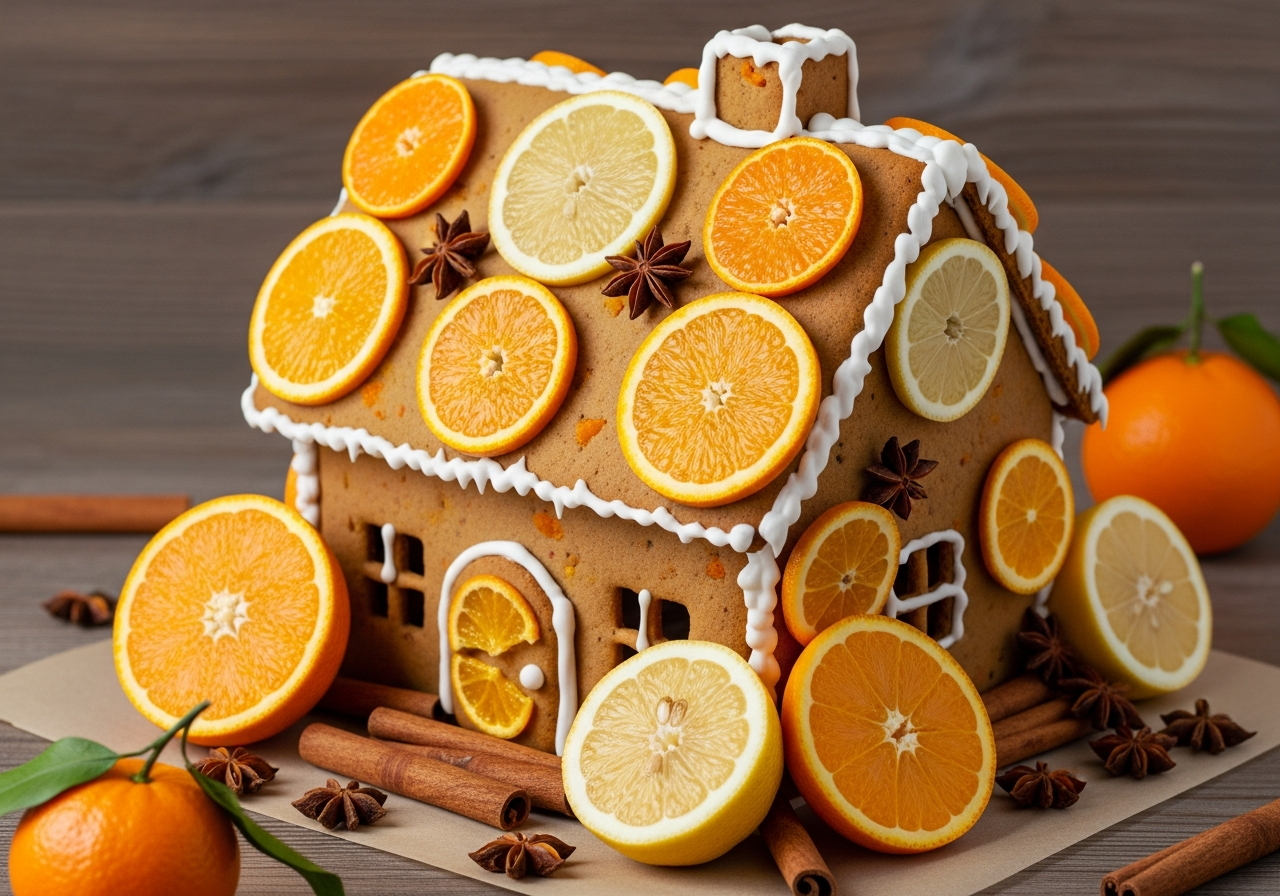
Spiced Citrus Variation Recipe
This contemporary twist incorporates orange and lemon zest for brightness while maintaining traditional spices. The flavor complexity photographs beautifully when styled with fresh citrus slices as decoration.
Cream three-quarters cup of butter with one cup of sugar. Add three-quarters cup of molasses, one egg, the zest of two oranges, and the zest of one lemon. Mix four and a half cups of flour with two teaspoons of baking soda, one tablespoon of ginger, one teaspoon of cinnamon, one teaspoon of cardamom, half a teaspoon of white pepper, and half a teaspoon of salt.
The cardamom and white pepper provide subtle complexity that distinguishes this recipe from standard gingerbread. The citrus zest adds visual interest with tiny flecks throughout the dough. These elements create a more artisanal appearance ideal for rustic photography styling.
Chill thoroughly and bake at 350 degrees Fahrenheit for twelve to fifteen minutes. The citrus oils make this dough slightly more tender, so avoid rolling thinner than quarter-inch. The fresher flavor makes this recipe better suited for houses intended for eating rather than long-term display.
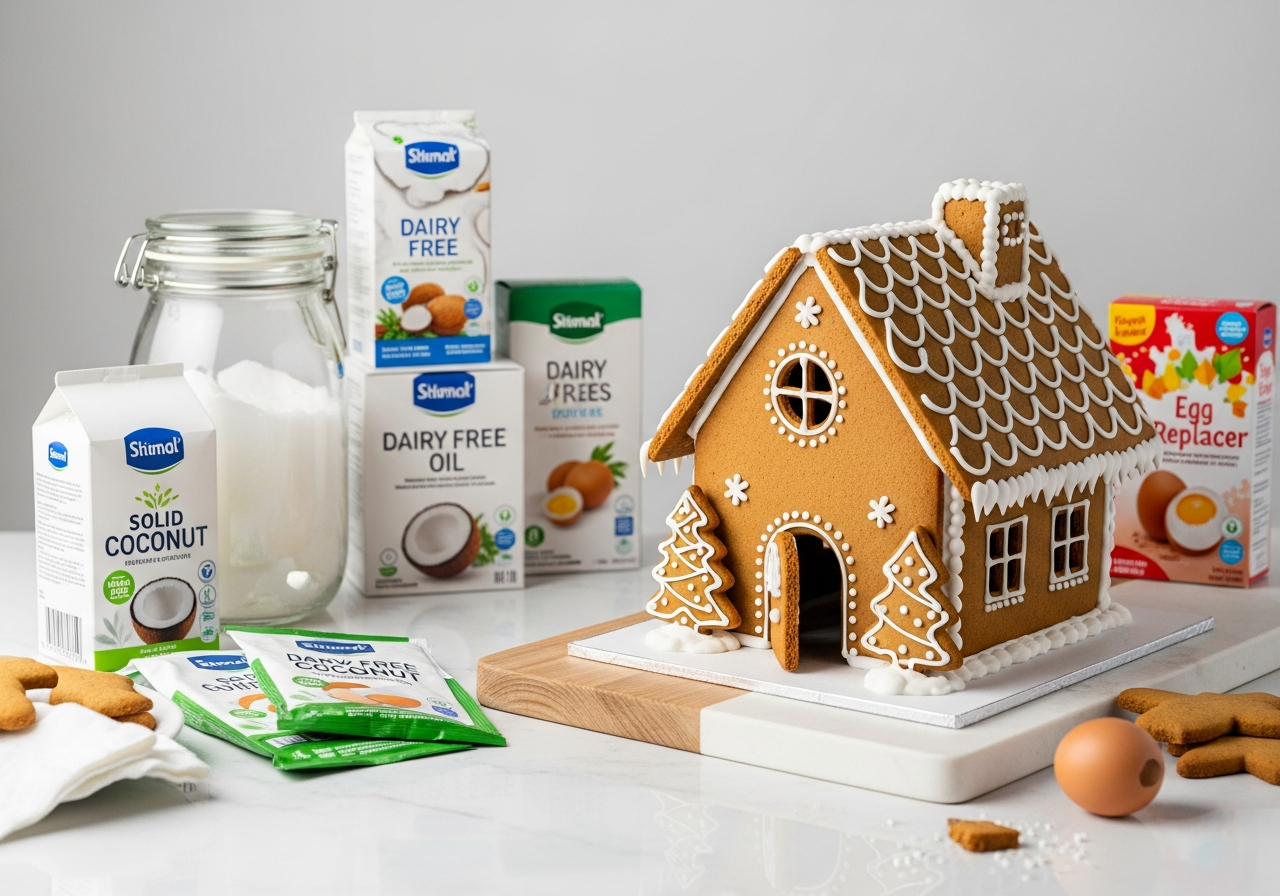
Vegan Construction Recipe
Plant-based gingerbread requires substitutions that maintain structural integrity without eggs or dairy. This formula uses commercial egg replacer and coconut oil successfully.
Prepare egg replacer equivalent to two eggs according to package directions. Melt three-quarters cup of refined coconut oil and combine with one cup of brown sugar and one cup of molasses. Add the prepared egg replacer. Mix four and a half cups of flour with two teaspoons of baking soda, one tablespoon of ginger, two teaspoons of cinnamon, one teaspoon of cloves, and one teaspoon of salt. Combine thoroughly.
Coconut oil solidifies when chilled, making this dough particularly easy to handle and cut. Refrigerate for four hours minimum. The absence of butter changes the flavor profile slightly, allowing spices to dominate more prominently.
Bake at 350 degrees Fahrenheit for twelve to fourteen minutes. Vegan Gingerbread House often bakes faster than traditional recipes because plant-based fats behave differently under heat. Watch carefully to prevent overbaking. The resulting structures prove remarkably sturdy and photograph identically to conventional gingerbread.
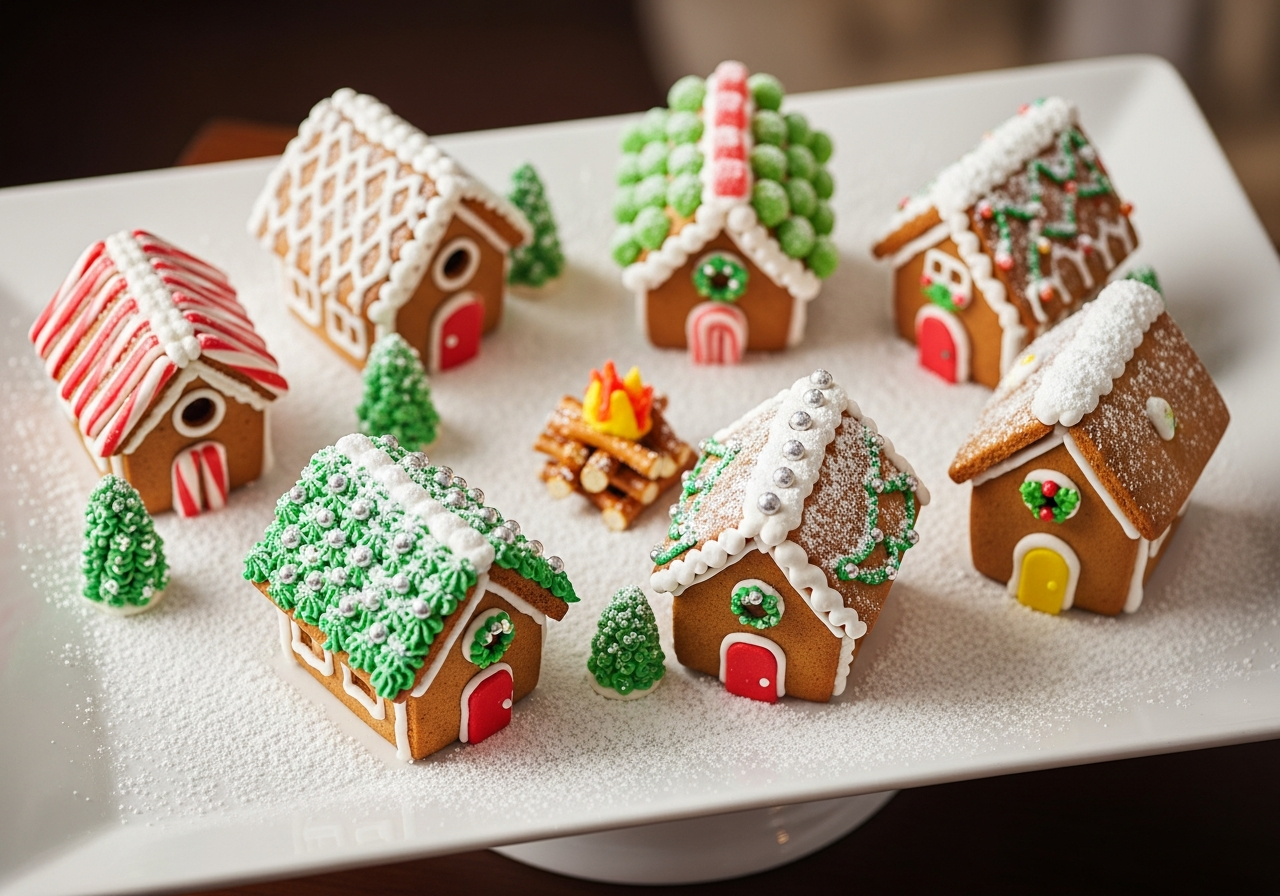
Small-Batch Individual Houses Recipe
Creating multiple miniature houses for party favors or photography requires a scaled recipe that remains manageable. This version makes four to six small structures.
Beat half a cup of butter with half a cup of brown sugar. Mix in half a cup of molasses and one egg. Combine two and a half cups of flour, one teaspoon of baking soda, one and a half teaspoons of ginger, one teaspoon of cinnamon, half a teaspoon of cloves, and half a teaspoon of salt. Mix until dough forms.
Individual houses offer creative freedom for experimentation without committing extensive time to a single large project. They photograph beautifully in groupings or as individual portraits with various themes. The smaller scale allows completion in a single afternoon including decorating time.
Roll dough to quarter-inch thickness and use small cutters or create miniature templates. Bake at 350 degrees Fahrenheit for eight to ten minutes only. Smaller pieces bake faster and can quickly overbake. Cool completely before assembling with royal icing.
Extra-Firm Professional Recipe
Competition-level Gingerbread House houses require exceptional strength. This recipe produces walls suitable for elaborate multi-story structures and intricate details.
Mix one cup of shortening with one and a half cups of brown sugar thoroughly. Add one and a quarter cups of molasses and blend completely. Whisk together six cups of bread flour, two teaspoons of baking soda, one tablespoon of ginger, two teaspoons of cinnamon, one teaspoon of allspice, and one and a half teaspoons of salt.
Bread flour provides higher protein content than all-purpose flour, developing more gluten and creating exceptional strength. This dough feels quite stiff and requires firm pressure when rolling. Chill overnight for best handling.
Roll to three-eighths inch thickness for maximum support. These thicker walls support heavy decorations without sagging. Bake at 325 degrees Fahrenheit for eighteen to twenty-two minutes until completely firm. The lower temperature ensures thorough drying without burning. Cool slowly on the baking sheet to prevent cracking from rapid temperature change.
Soft-Eating Compromise Recipe
Some bakers want structures strong enough for assembly yet pleasant enough to eat afterward. This recipe balances both concerns through careful ingredient selection.
Cream two-thirds cup of butter with three-quarters cup of brown sugar. Mix in two-thirds cup of molasses and one egg plus one egg yolk for extra richness. Combine four cups of flour, one and a half teaspoons of baking soda, two teaspoons of ginger, one and a half teaspoons of cinnamon, half a teaspoon of nutmeg, and three-quarters teaspoon of salt.
The additional egg yolk and reduced flour ratio create a slightly more tender result while maintaining adequate strength for assembly. This proves ideal for houses constructed for parties where guests will eat the structure within a few days.
Roll to slightly generous quarter-inch thickness and bake at 340 degrees Fahrenheit for eleven to thirteen minutes. The moderate temperature and shorter baking preserve more tenderness. Assemble carefully using proper royal icing technique, allowing full drying time between construction stages.
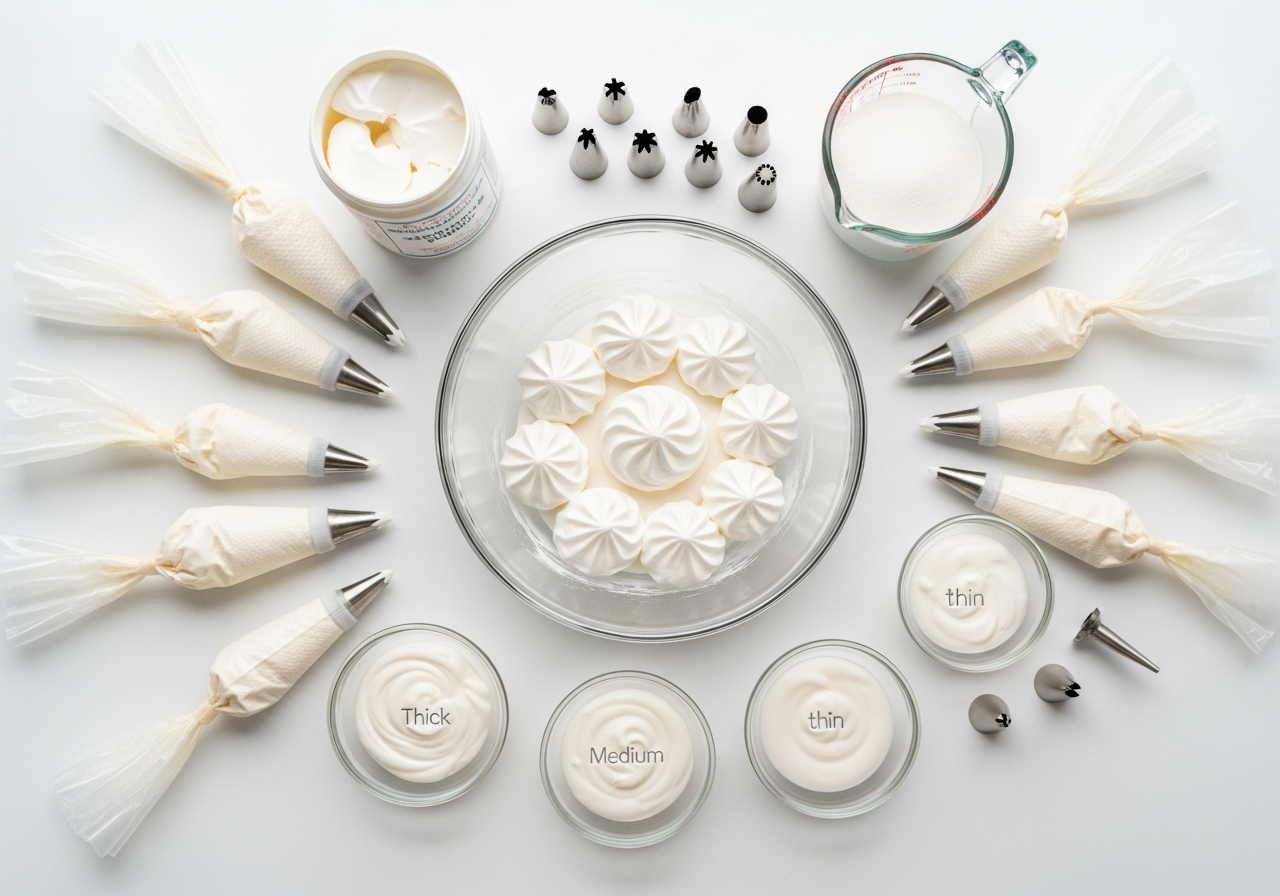
Royal Icing Foundation Recipe
Every gingerbread house requires proper adhesive for assembly and decoration. Royal icing dries rock-hard, creating permanent bonds between pieces. The basic formula requires simple ingredients with precise technique.
Beat three egg whites or half a cup of meringue powder mixed with six tablespoons of water until frothy. Gradually add one pound of confectioners sugar, beating continuously. Add one teaspoon of vanilla extract or lemon juice and one-quarter teaspoon of cream of tartar. Beat on high speed for seven to ten minutes until stiff, glossy peaks form.
Consistency matters tremendously for different applications. Assembly icing should hold a stiff peak without flowing. Piping icing needs slight thinning for smooth lines. Flood icing requires even more liquid for filling large areas. Adjust consistency by adding water by the half-teaspoon or additional confectioners sugar by the tablespoon.
Store royal icing covered with plastic wrap pressed directly onto the surface to prevent crusting. It remains workable for several hours at room temperature. Clean all tools immediately after use, as dried royal icing bonds permanently.
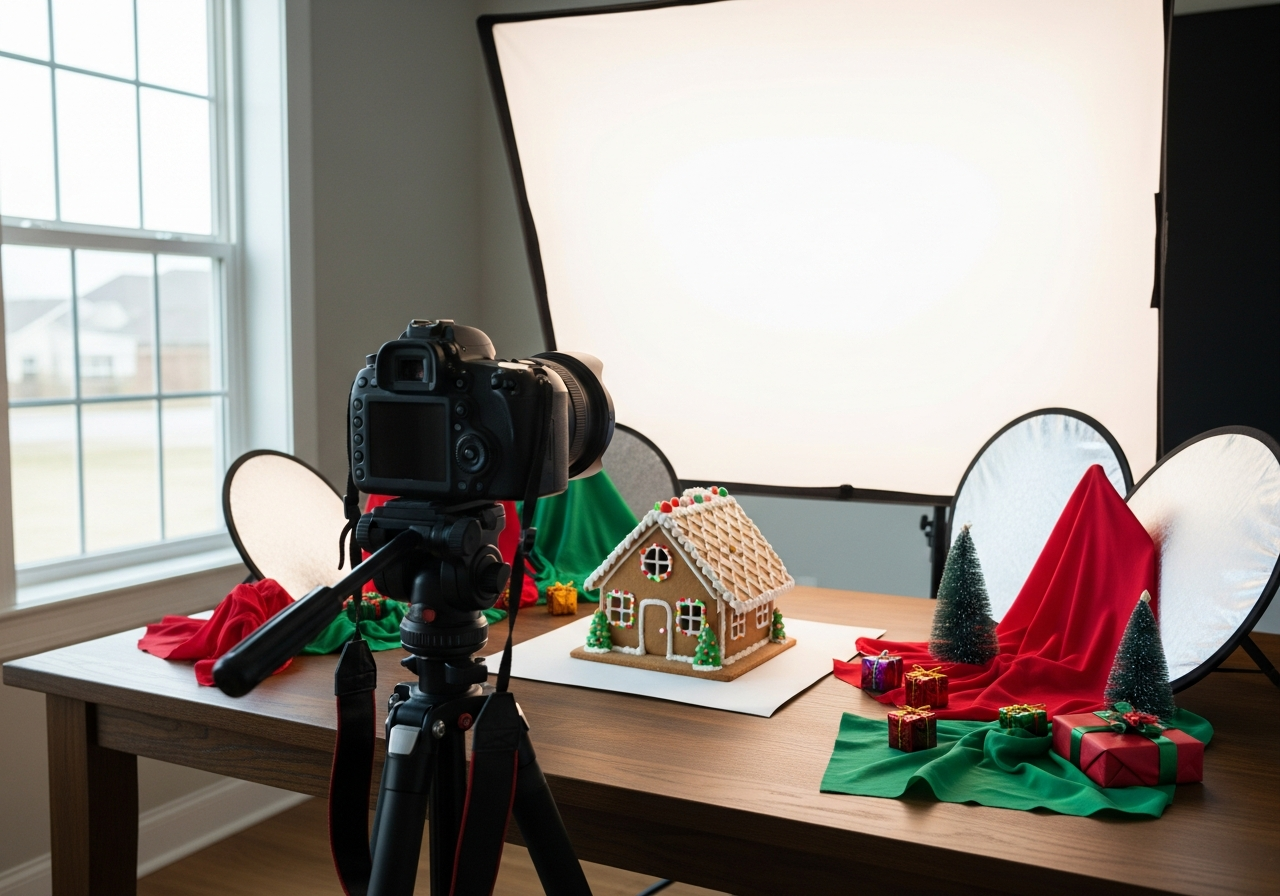
Styling Techniques for Photography
Creating visually stunning gingerbread houses requires attention to composition, lighting, and styling elements beyond the structure itself. Professional food photographers employ specific techniques that elevate simple houses into compelling images.
Background selection influences the overall mood significantly. White surfaces create clean, modern aesthetics ideal for highlighting colorful decorations. Rustic wood boards suggest traditional homestyle appeal. Dark backgrounds provide dramatic contrast for white-frosted designs. Consider your intended audience and platform when selecting backgrounds.
Lighting determines texture visibility and color accuracy. Natural window light produces the most authentic results, particularly when diffused through sheer curtains. Position your house so light comes from one side at roughly a forty-five-degree angle. This creates dimensional shadows that reveal details. Avoid direct overhead lighting, which flattens features.
Props enhance storytelling without overwhelming the main subject. Small evergreen sprigs, cinnamon sticks, or scattered candies create context. Miniature figurines add whimsy for family-focused images. Avoid cluttering the frame with excessive props. Each element should serve the composition purposefully.
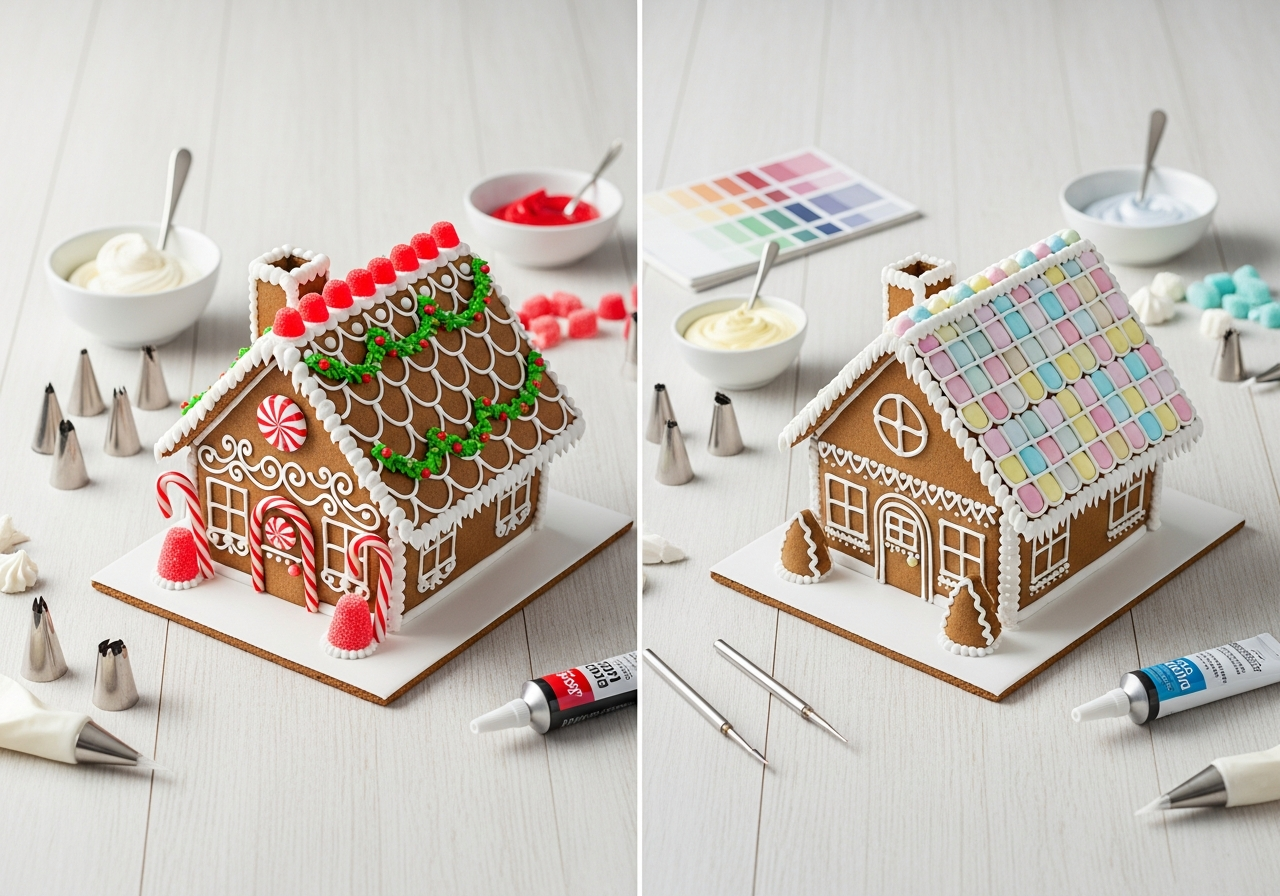
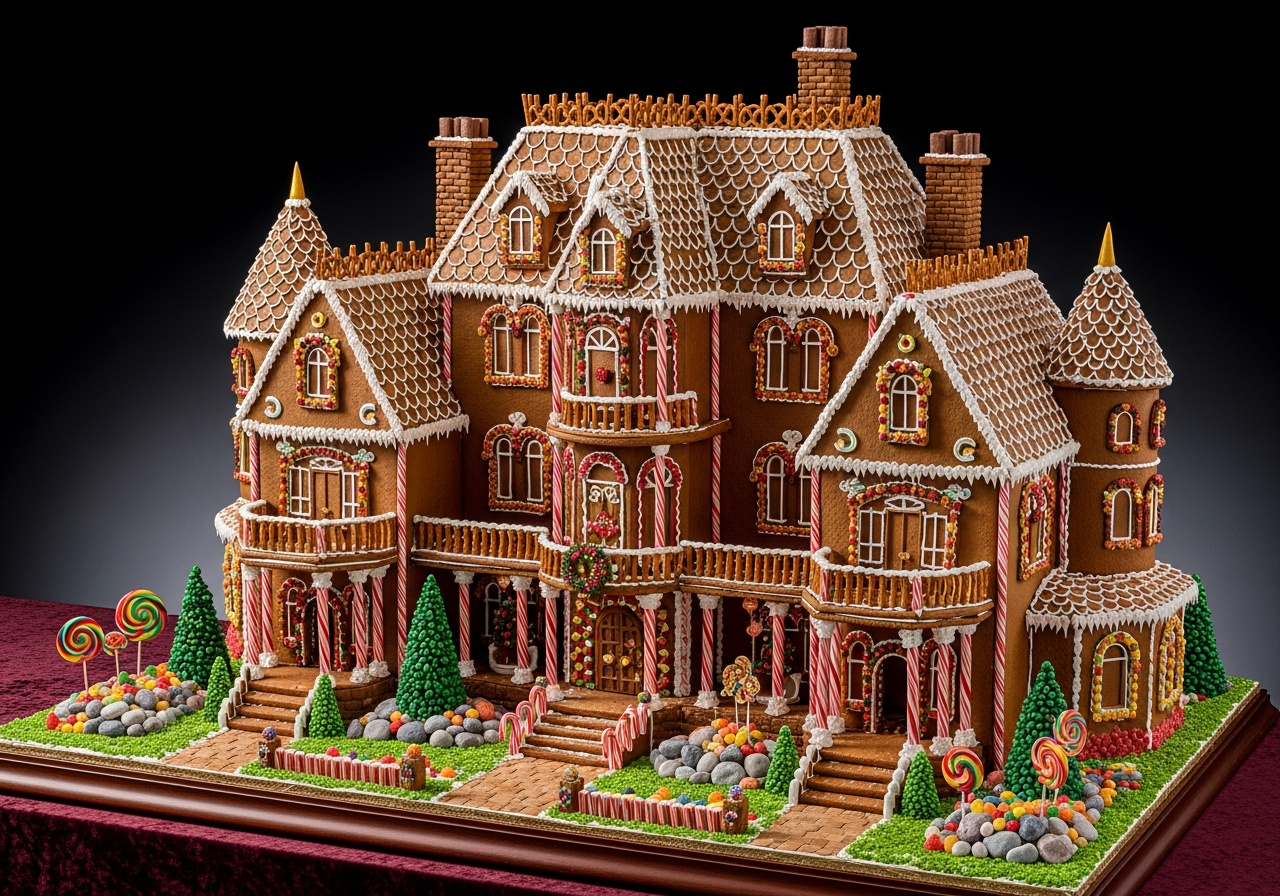
Decorating Strategies for Visual Impact
Strategic decoration transforms a basic gingerbread structure into an eye-catching creation. Understanding color theory, texture contrast, and focal points guides decision-making throughout the decorating process.
Color schemes establish immediate emotional responses. Traditional red and white evokes classic Christmas nostalgia. Pastel combinations suggest modern, sophisticated styling. Monochromatic approaches using various shades of one color create elegant simplicity. Complementary colors like blue and orange provide vibrant contrast.
Texture variation prevents visual monotony. Combine smooth piped icing with rough candy surfaces. Pair shiny wrapped candies with matte sugars. Layer different elements rather than applying them flatly. Dimensional decorations cast interesting shadows under proper lighting.
Focal points direct viewer attention intentionally. Elaborate doorways, detailed windows, or ornate rooflines serve as primary visual anchors. Avoid decorating every surface equally, which creates visual confusion. Leave some areas simpler to provide rest for the eye and emphasize decorated sections more effectively.

Assembly Methods for Structural Integrity
Proper assembly technique determines whether a house stands proudly or collapses disappointingly. Professional builders follow systematic approaches that ensure stability throughout the construction process.
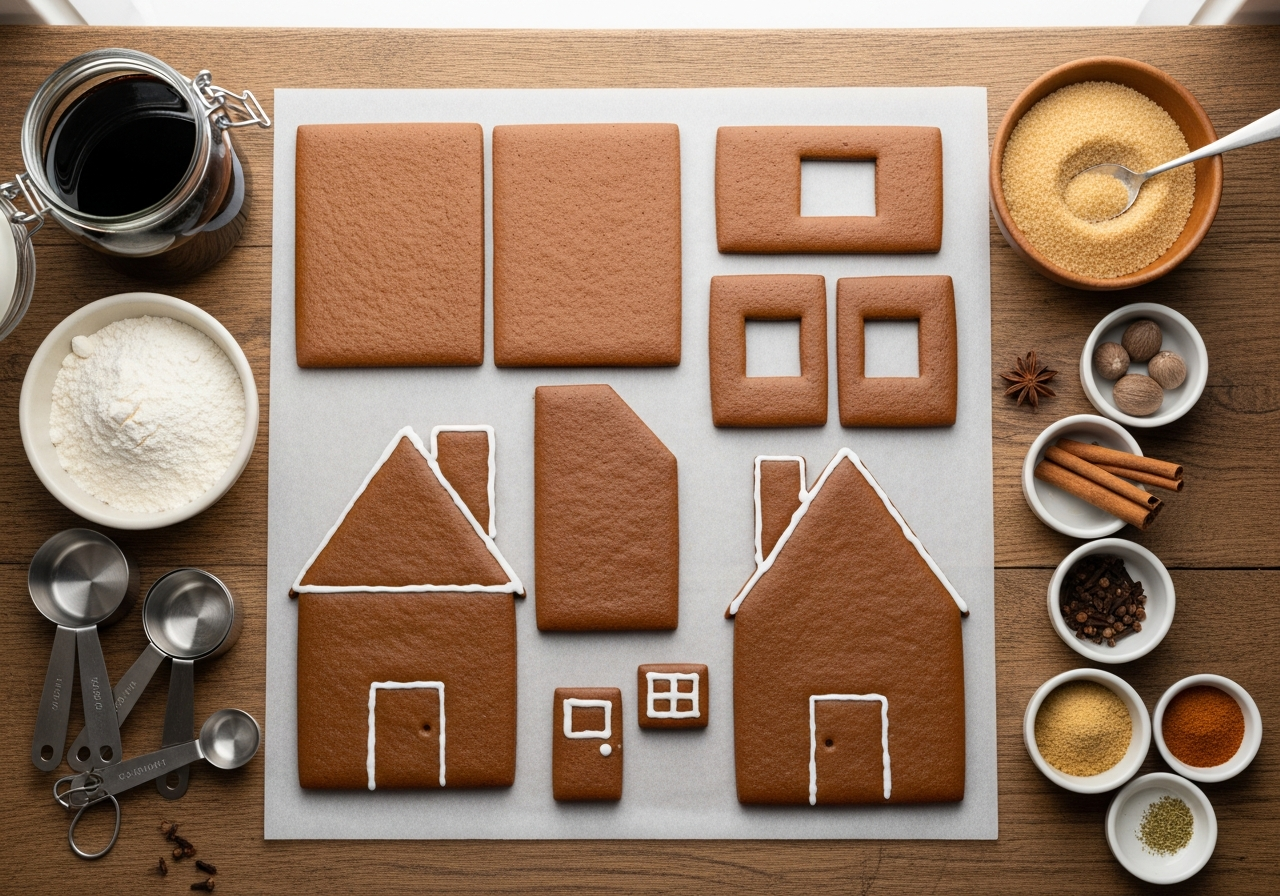
Base preparation provides crucial support. Heavy cardboard, wooden cake boards, or serving platters all work well. Cover with parchment paper or aluminum foil before construction for easier removal later. Apply a layer of royal icing to the base where walls will stand, creating a foundation that bonds permanently.
Wall assembly requires patience. Pipe thick royal icing lines along edges where pieces will join. Press walls together firmly and hold for sixty to ninety seconds until the icing begins setting. Use cans, jars, or boxes as temporary supports while the icing dries completely. Allow at least thirty minutes before adding the roof.
Roof attachment demands extra caution as gravity works against you. Pipe generous icing beads along the top edges of all walls. Position one roof panel first, supporting it with one hand or propped objects. Let it set for ten minutes before adding the second panel. Support both panels until the icing hardens completely, typically two to four hours.
Troubleshooting Common Construction Issues
Even experienced bakers encounter challenges during gingerbread house projects. Recognizing problems and implementing solutions maintains progress without frustration.
Spreading dough indicates insufficient chilling or improper flour measurement. If rolled pieces spread during baking, freeze cut shapes for twenty minutes before baking. Verify accurate flour measuring using the spoon-and-level method rather than scooping directly from the bag, which compacts flour and reduces the amount.
Cracked walls result from too-rapid cooling or overly dry dough. Allow baked pieces to cool gradually on the baking sheet at room temperature. If dough feels crumbly when mixing, add water one teaspoon at a time until it cohesively holds together. Cracks in baked pieces can be disguised with royal icing or strategic candy placement.
Collapsing structures point to insufficient drying time between construction stages or weak icing consistency. Royal icing must achieve stiff peak consistency for assembly. Test by lifting the beater; icing should stand straight up without drooping. Allow assembled walls to dry for the full recommended time before adding the roof, even when impatience tempts you to rush.
Advanced Decoration Techniques
Mastering basic construction enables exploration of sophisticated decorating methods that distinguish exceptional creations from ordinary ones. These techniques require practice but produce remarkable results.
Piping consistency mastery allows creation of various decorative elements. Practice pressure control on parchment paper before working on the house. Consistent pressure produces uniform lines while varied pressure creates dimensional effects. Use different tips for different purposes: small round tips for outlining and details, star tips for textured effects, and leaf tips for foliage.
Candy windows using melted hard candies or sugar create translucent, colorful effects that photograph beautifully when backlit. Before baking, cut window openings from your gingerbread pieces. Place cut pieces on silicone baking mats and fill window openings with crushed hard candies. Bake according to recipe directions. The candy melts and fills openings with glass-like sheets.
Snow effects using various techniques create realistic wintry scenes. Sift powdered sugar over completed houses for fresh snowfall. Pipe royal icing in varying thicknesses for drifts and icicles. Mix royal icing with coarse sugar for textured snowbanks. Combine multiple methods for dimensional snow coverage.
Storage and Display Considerations
Completed gingerbread houses require proper handling to maintain appearance throughout the holiday season. Understanding preservation techniques extends display life significantly.
Environmental control prevents deterioration. Display houses in cool, dry locations away from heating vents and direct sunlight. Humidity softens gingerbread and melts candy decorations. High temperatures cause similar problems. Ideal conditions range from sixty to seventy degrees Fahrenheit with low humidity.
Protective measures keep decorations intact. Place houses under glass domes or clear plastic containers if available. This prevents dust accumulation and discourages touching. If leaving uncovered, position houses where they will not be bumped or handled frequently.
Duration expectations help plan timing. Properly stored gingerbread houses last four to six weeks before quality declines noticeably. Plan construction two to three weeks before desired display period. Houses older than six weeks become increasingly fragile and less appetizing if anyone intends to eat them.
Theme Variations for Different Occasions
Gingerbread houses adapt beautifully to various themes beyond traditional Christmas cottages. Exploring alternative concepts creates unique photo opportunities and personalized expressions.
Winter wonderland themes emphasize white and silver tones. Cover roofs entirely with white royal icing and coarse sugar. Use silver dragees sparingly for icy accents. Add blue food coloring to icing for subtle frost effects. Surround houses with cotton batting for snowdrifts and small mirror tiles for frozen ponds.
Rustic cabin concepts showcase natural, woodsy aesthetics. Use pretzel sticks or rods to create log cabin appearances. Incorporate brown candies and chocolate decorations. Add cinnamon sticks as firewood piles. Use green frosting and gumdrops to suggest surrounding forest. These themes photograph beautifully with natural backgrounds and warm lighting.
Modern minimalist approaches strip decoration to essential elements. Use monochromatic color schemes with precise, clean lines. Focus on architectural details rather than candy abundance. This contemporary style appeals to design-focused audiences and creates striking, graphic images.
Professional Finishing Touches
Final details separate competent projects from truly professional results. Attention to small elements completes the visual story and enhances photographic appeal.
Edge cleanup ensures crisp appearances. Use small kitchen scissors to trim excess dried royal icing carefully. Wipe smudges from gingerbread surfaces with barely damp cloths. Touch up any gaps or imperfections with additional piping. Clean, precise edges photograph dramatically better than messy ones.
Strategic highlighting draws attention to featured elements. Use edible luster dust on specific decorations to create shimmer. Apply pearl dust to piped details for elegant sheen. Add gold or silver accents sparingly for sophisticated touches. These metallic elements catch light beautifully in photographs.
Context creation tells a complete story. Add complementary elements around the house rather than presenting it in isolation. Small bottlebrush trees, ceramic figurines, or scattered decorative elements create scene context. Consider the narrative your image conveys and support it with thoughtful styling.
Conclusion
Creating gingerbread houses combines culinary skill, artistic vision, and architectural planning into a rewarding seasonal tradition. The fifteen recipes and techniques presented here provide comprehensive guidance for projects ranging from simple family activities to elaborate showpieces worthy of competition entry. Success requires understanding the distinct properties of construction gingerbread, mastering royal icing consistency, and applying strategic decorating approaches.
Whether you aim to capture stunning photographs for social media, create edible centerpieces for holiday gatherings, or simply enjoy meditative creative time in your kitchen, these foundational skills enable confident execution. The process itself offers as much value as the finished product, providing opportunities for personal expression and skill development.
As you experiment with these recipes and techniques, remember that every baker develops their own preferences and methods through practice. Start with the approaches that match your current skill level and gradually incorporate more advanced techniques. Your unique style will emerge naturally as you build experience. Most importantly, embrace the imperfections and enjoy the creative journey that gingerbread house making offers each holiday season.
Frequently Asked Questions
How long does gingerbread dough need to chill before rolling?
Gingerbread dough requires a minimum of three hours of refrigeration, though overnight chilling produces the best results. The cold temperature solidifies the fats, making the dough easier to roll without sticking and preventing excessive spreading during baking. For honey-based recipes, extend chilling time to six hours due to higher moisture content.
Can I make gingerbread house pieces ahead of time?
Yes, baked gingerbread pieces store excellently when properly sealed. Once completely cooled, layer pieces between parchment paper in airtight containers and store at room temperature for up to two weeks. Alternatively, freeze baked pieces for up to three months. Thaw overnight at room temperature before assembling. This make-ahead approach simplifies holiday preparation significantly.
What makes construction gingerbread different from cookie gingerbread?
Construction gingerbread contains higher flour ratios and less fat than traditional cookies, creating a firmer, drier texture that maintains structural integrity. It often uses shortening instead of butter to minimize spreading during baking. While construction gingerbread remains technically edible, it prioritizes strength over tenderness. Regular cookie recipes produce walls too soft to support decorations or maintain vertical positions.
How do I fix a gingerbread house that starts leaning or falling apart?
Support leaning walls immediately with cans or jars while applying additional royal icing to weakened joints. Allow the icing to dry completely, which takes two to four hours. For severe structural issues, carefully disassemble the affected section, scrape away old icing, and reassemble with fresh royal icing at stiff peak consistency. Ensure proper drying time between construction stages to prevent recurring problems.
What lighting works best for photographing gingerbread houses?
Natural window light diffused through sheer curtains creates the most flattering illumination for gingerbread photography. Position the house so light strikes from one side at a forty-five-degree angle, creating dimensional shadows that reveal decorative details. Avoid overhead lighting or direct flash, which flatten features and create harsh shadows. For evening photography, use continuous LED lights positioned similarly to natural light for consistent, controllable results.