
25 New Year’s Eve Nail Designs That’ll Steal the Show
New Year’s Eve represents more than just another celebration on the calendar. It marks a moment of transformation, a chance to close one chapter and begin another with intention and style. While planning your outfit and perfecting your makeup routine matter, there is one detail that often completes the entire look: your manicure. The right nail design can elevate your confidence, complement your ensemble, and capture the festive spirit of the occasion.
The beauty of New Year’s Eve nail designs lies in their versatility and ability to reflect personal style while embracing the celebratory atmosphere. Whether you prefer understated elegance or bold statements, subtle shimmer or dramatic sparkle, this comprehensive guide presents twenty-five stunning Eve Nail Designs that will make your hands the center of attention when the clock strikes midnight. From timeless metallics to innovative chrome finishes, each design offers a unique way to express your personality while welcoming the new year in style.

Classic Metallic Elegance
Gold Gilded Perfection
Gold remains the quintessential color for New Year’s Eve celebrations, symbolizing prosperity, success, and luxury. A full gold manicure creates an opulent statement that captures light beautifully throughout the evening. The technique involves applying a high-quality gold polish over a properly prepped nail bed, ensuring smooth coverage without streaks or bubbles.
For added dimension, consider incorporating different gold tones within the same manicure. Rose gold accents on a yellow gold base create visual interest, while champagne gold tips over a nude foundation offer sophistication. The key to achieving professional results lies in using thin, even coats and allowing adequate drying time between applications.

Silver Chrome Sophistication
Silver chrome nails deliver a mirror-like finish that reflects the celebratory lights of any New Year’s gathering. This futuristic look requires chrome powder applied over a black or dark base color, then sealed with a quality topcoat. The reflective quality makes hands appear polished and modern, perfect for contemporary style preferences.
The application process demands precision but rewards patience with stunning results. After applying the base color and allowing complete drying, rub the chrome powder onto the nail surface using a silicone applicator or your fingertip. The friction creates the signature mirror effect that distinguishes chrome nails from ordinary metallic polish.
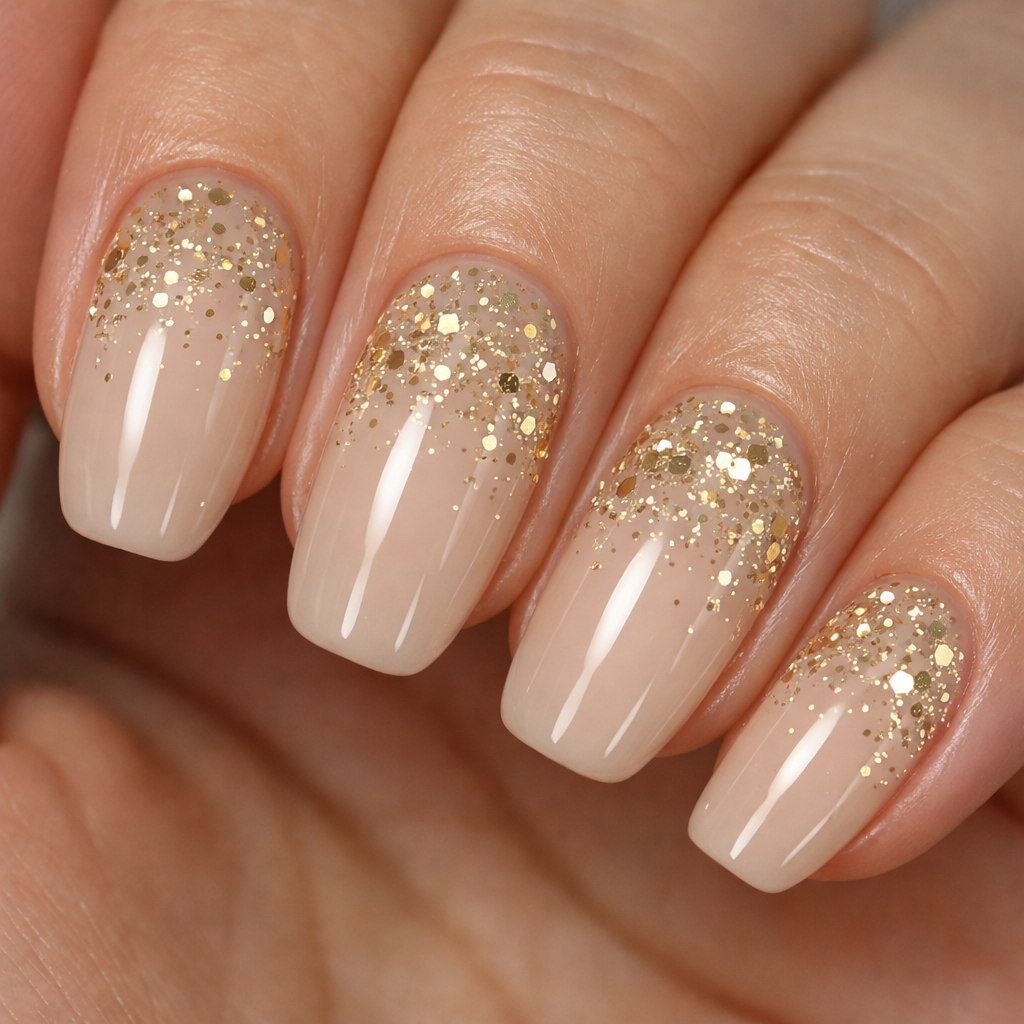
Champagne Bubble Effect
Inspired by the traditional midnight toast, champagne-colored nails with strategic glitter placement mimic the effervescence of sparkling wine. This design features a milky beige base topped with carefully positioned glitter particles that appear to rise from the cuticle toward the tip, creating an illusion of bubbles ascending in a glass.
The technique requires a steady hand and attention to detail. Apply the nude base color first, then use a fine-tipped brush to place individual glitter pieces in a gradient pattern. Smaller particles near the tip and larger ones toward the base enhance the bubble effect. Seal everything with a glossy topcoat to maintain the dimensional appearance.
Glitter and Sparkle Variations
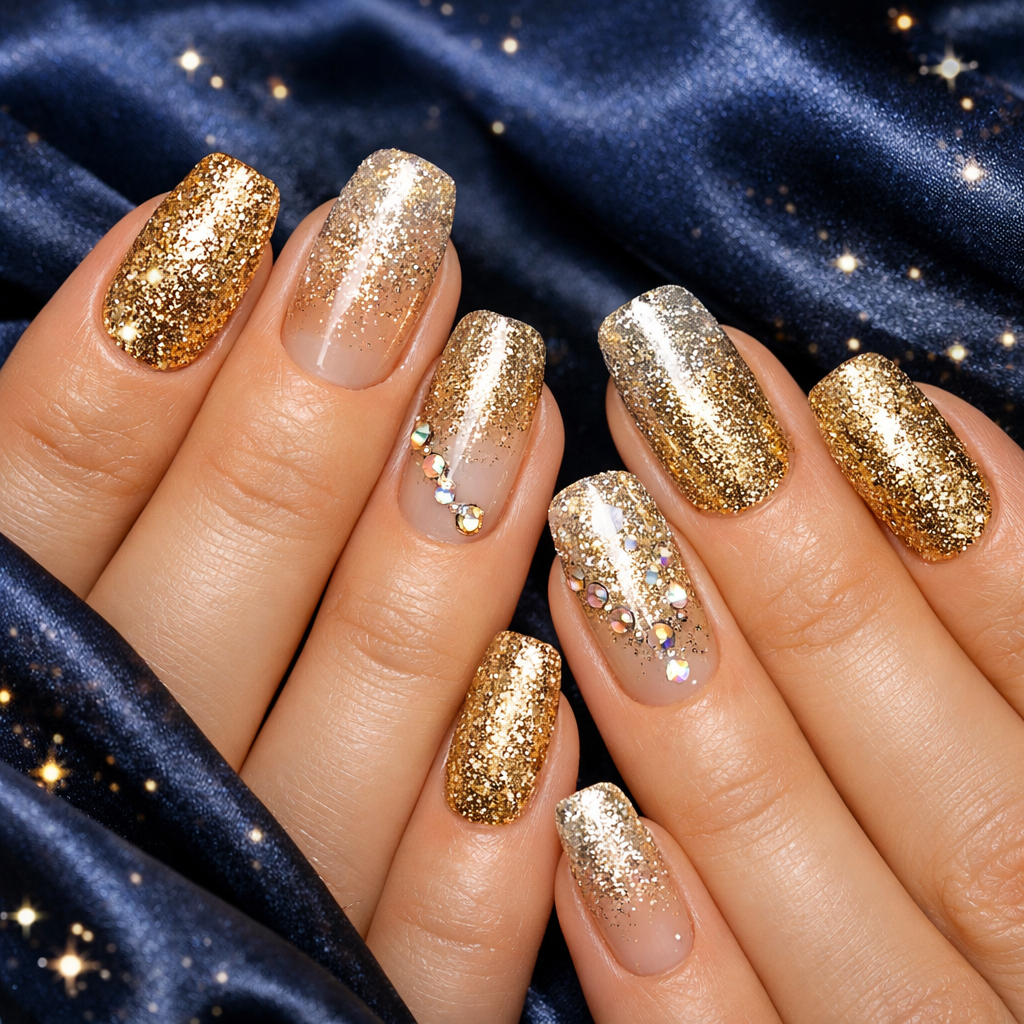
Full Glitter Coverage
Nothing says celebration quite like nails completely covered in glitter. This maximalist approach embraces the festive spirit without reservation. Choose glitter polish in silver, gold, or iridescent finishes for maximum impact. The density of glitter particles creates a textured surface that catches light from every angle.
Application requires building coverage gradually through multiple thin layers rather than one thick coat. This method prevents clumping and ensures even distribution across the entire nail surface. Allow each layer to dry partially before applying the next, finishing with two coats of topcoat to smooth the texture and extend wear time.
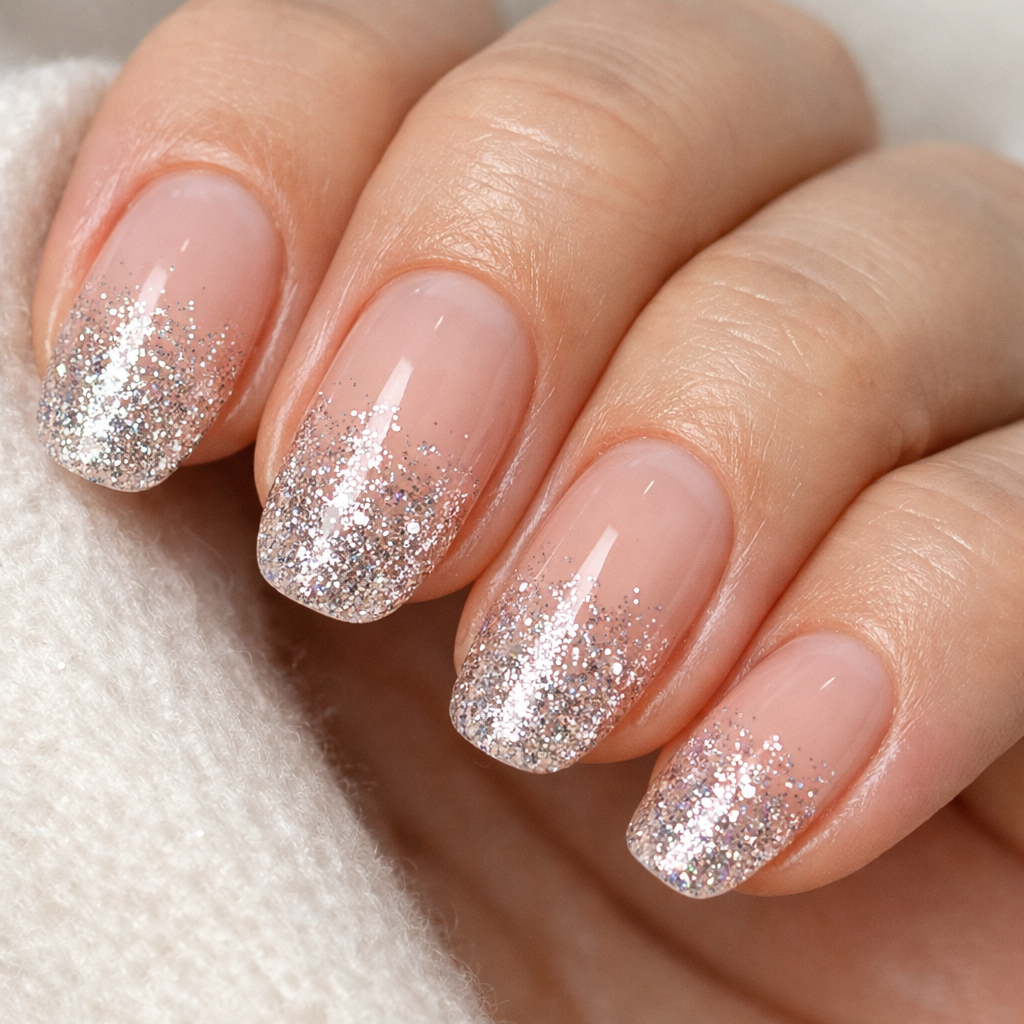
Glitter Gradient Fade
For those who prefer a more subtle approach to sparkle, the glitter gradient offers the perfect compromise. This technique concentrates glitter at the nail tips, gradually fading toward the cuticle where the base color remains visible. The effect creates visual length while maintaining wearability for those hesitant about full glitter coverage.
Start with your chosen base color in nude, pink, or any neutral tone. While the polish remains slightly tacky, apply glitter polish beginning at the tip and using lighter pressure as you move toward the cuticle. A makeup sponge dabbed in glitter polish also achieves this gradient beautifully, allowing better control over the fade intensity.

Glitter Accent Nails
Strategic placement of glitter on select nails creates balance and sophistication. This design typically features a solid color on most nails with one or two glitter accent nails per hand. The contrast draws attention without overwhelming the overall aesthetic, making it suitable for both formal events and casual celebrations.
Choose accent nail placement based on personal preference and hand shape. Ring fingers traditionally receive accent treatment, but thumb and middle finger combinations also work well. Ensure the glitter shade complements rather than matches the base color for optimal visual interest.
French Manicure Reimagined

Metallic French Tips
The timeless French manicure receives a festive update with metallic tips replacing traditional white. Gold, silver, or rose gold tips paired with a nude or soft pink base create elegance with a celebratory twist. This design suits all nail lengths and shapes, making it universally flattering.
Achieving clean metallic tips requires either steady freehand skills or quality nail guides. Apply the base color first, allowing complete drying. Then carefully paint the tips with metallic polish, using thin coats for precision. For those less confident in their application skills, metallic nail stickers offer a foolproof alternative.

Glitter-Tipped French
Combining the classic French silhouette with glitter tips creates a manicure that transitions seamlessly from sophisticated to celebratory. The clear or nude base maintains professionalism while the glittered tips signal party-readiness. This versatile design works for New Year’s Eve events ranging from intimate dinners to crowded dance floors.
The application process mirrors traditional French manicures but substitutes glitter polish for white. Use guides or tape to ensure straight, even lines across all nails. The key difference lies in building glitter coverage gradually, as the particles require multiple coats for opacity.

Reverse French with Metallic Moons
This innovative take on French nails places metallic color at the cuticle rather than the tip. The reverse placement creates unexpected visual interest while maintaining the refined aesthetic associated with French manicures. Gold or silver half-moons against darker base colors like burgundy, navy, or black create striking contrast.
Begin by applying the darker base color and allowing full drying. Use reinforcement stickers or curved guides positioned at the cuticle area to create clean half-moon shapes. Apply metallic polish within these guides, remove them while the polish remains wet, and seal everything with topcoat once completely dry.
Bold Color Combinations

Black and Gold Drama
Few combinations convey sophistication quite like black and gold. This pairing works in numerous configurations: black base with gold accents, alternating black and gold nails, or black nails with gold geometric Eve Nail Designs. The contrast creates visual drama appropriate for the significance of New Year’s Eve.
One effective approach involves painting most nails black while featuring gold on accent nails. Another method creates black bases with gold foil pieces applied randomly or in specific patterns. Gold striping tape offers yet another option for adding linear gold elements to black nails without requiring artistic skills.
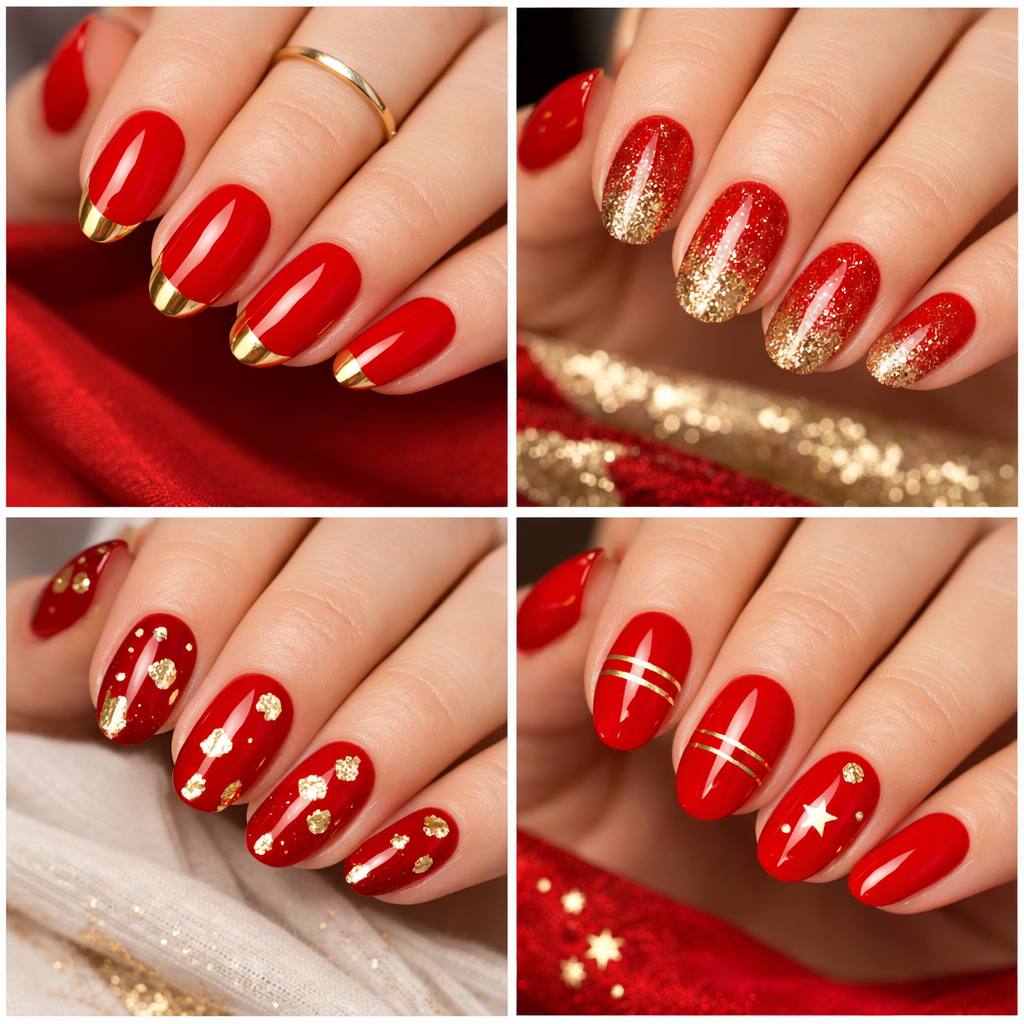
Red and Gold Opulence
Red symbolizes passion, energy, and celebration across many cultures, making it naturally suited for New Year’s festivities. When paired with gold accents, red nails achieve a level of luxury that feels appropriate for the occasion. The warmth of both colors creates cohesion while the metallic element adds necessary sparkle.
Application options include red nails with gold tips, red bases with gold glitter gradients, or red polish topped with gold foil pieces. For those seeking subtlety, thin gold stripes or small gold star details on red nails provide festive touches without overwhelming the design.
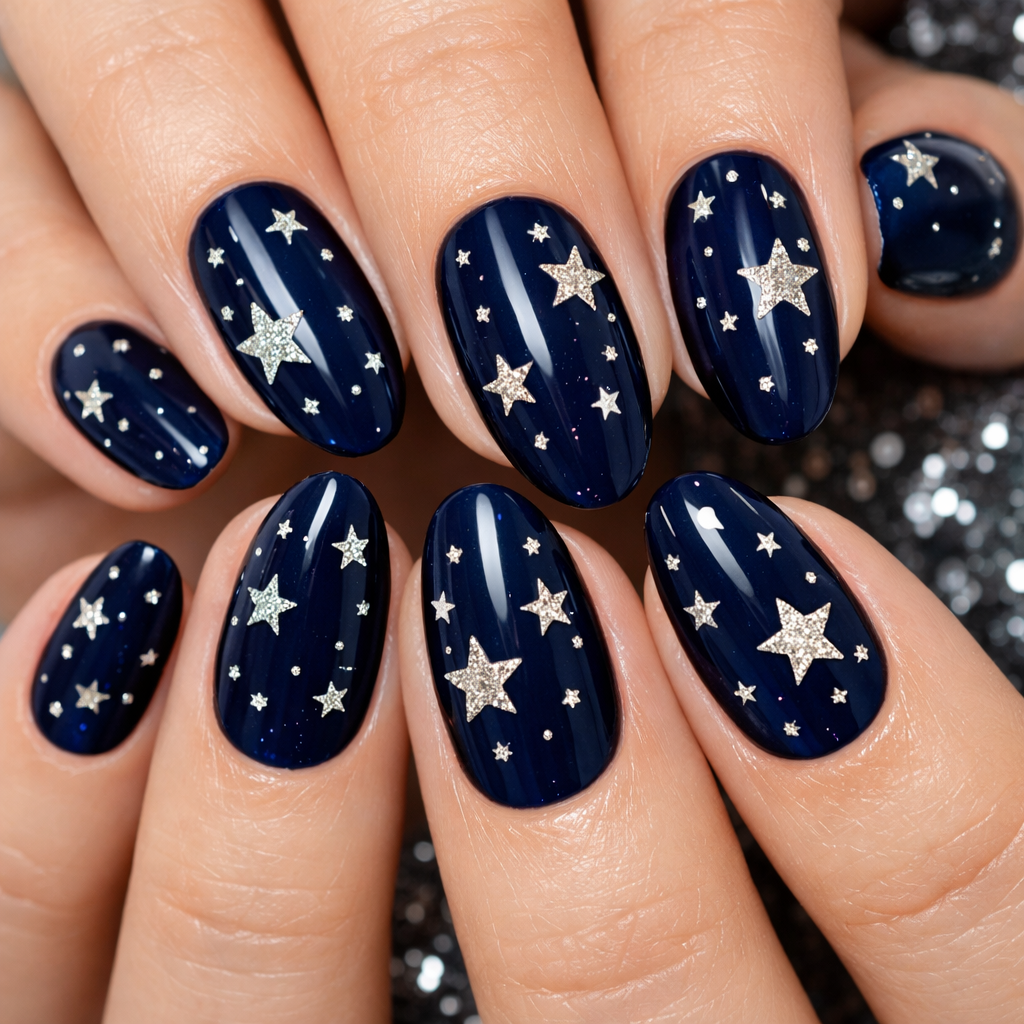
Midnight Blue with Silver Stars
Deep blue nails evoke the midnight sky, creating thematic appropriateness for New Year’s Eve celebrations. Adding silver star details enhances this celestial reference while incorporating necessary sparkle. This combination suits those who prefer cooler tones and want Eve Nail Designs that feel both festive and sophisticated.
Create this look by applying navy or midnight blue polish as the base. Once completely dry, use a fine detail brush to paint small silver stars scattered across some or all nails. Alternatively, star-shaped glitter pieces or small rhinestones achieve similar effects with less technical skill required.
Chrome and Holographic Effects

Full Chrome Coverage
Chrome nails dominated recent years and remain relevant for New Year’s celebrations. The mirror-like finish created through chrome powder application delivers unmatched shine and modernity. Available in numerous colors beyond traditional silver, chrome finishes suit diverse style preferences while maintaining that signature reflective quality.
Achieving chrome nails requires specific products and techniques. Apply a dark base color, preferably black, and cure or dry completely. Rub chrome powder onto the nail surface using gentle, circular motions until the entire nail reflects like a mirror. Seal immediately with topcoat designed for chrome finishes to prevent dulling.
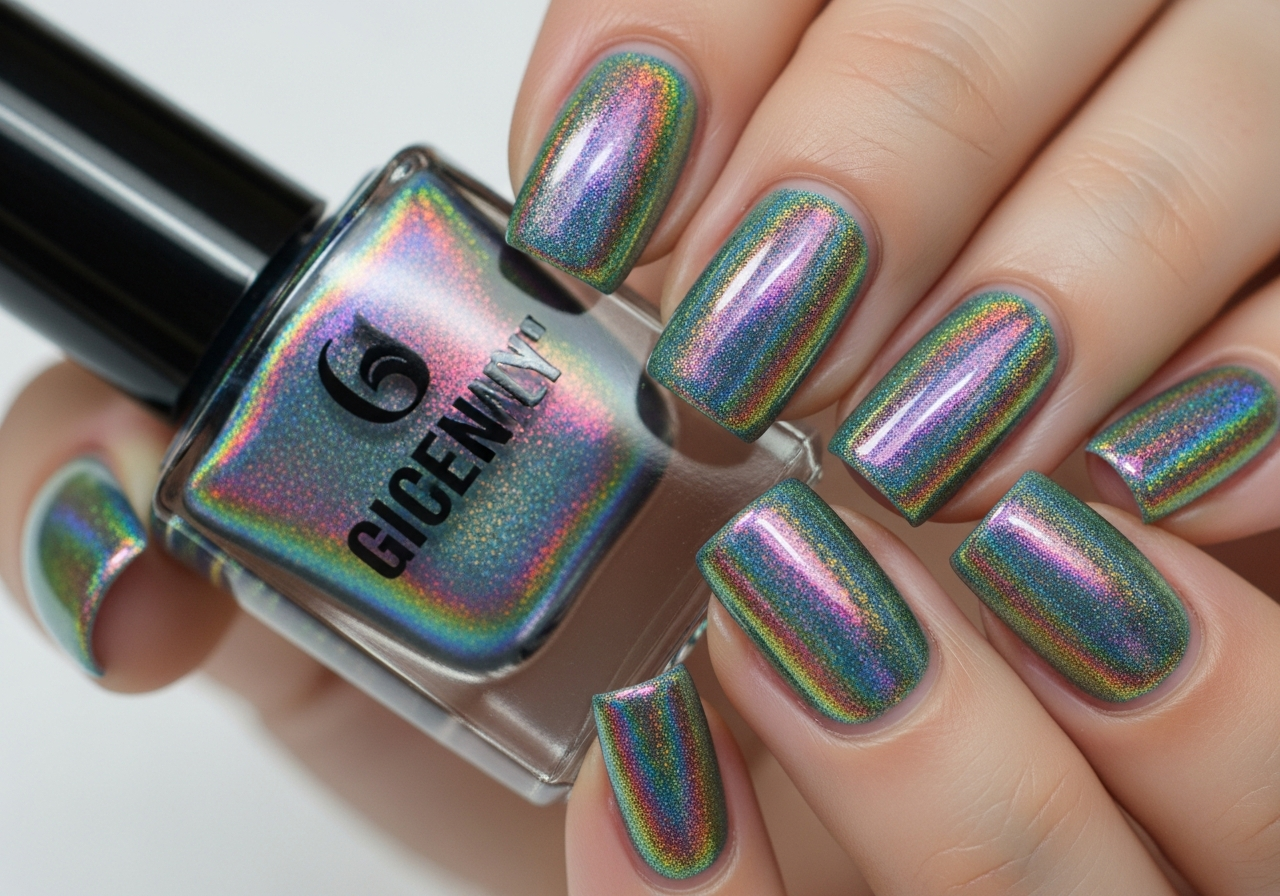
Holographic Rainbow
Holographic polishes create mesmerizing color shifts as hands move through different lighting conditions. The multidimensional effect captures rainbow hues within a single polish application, creating visual interest that photographs beautifully. This option appeals to those wanting something special without committing to specific color schemes.
Application follows standard polish techniques but benefits from black base coats that intensify the holographic effect. Two to three coats of holographic polish typically achieve full opacity and maximum color shift. Quick-dry topcoats help protect the delicate holographic particles from damage during the curing process.
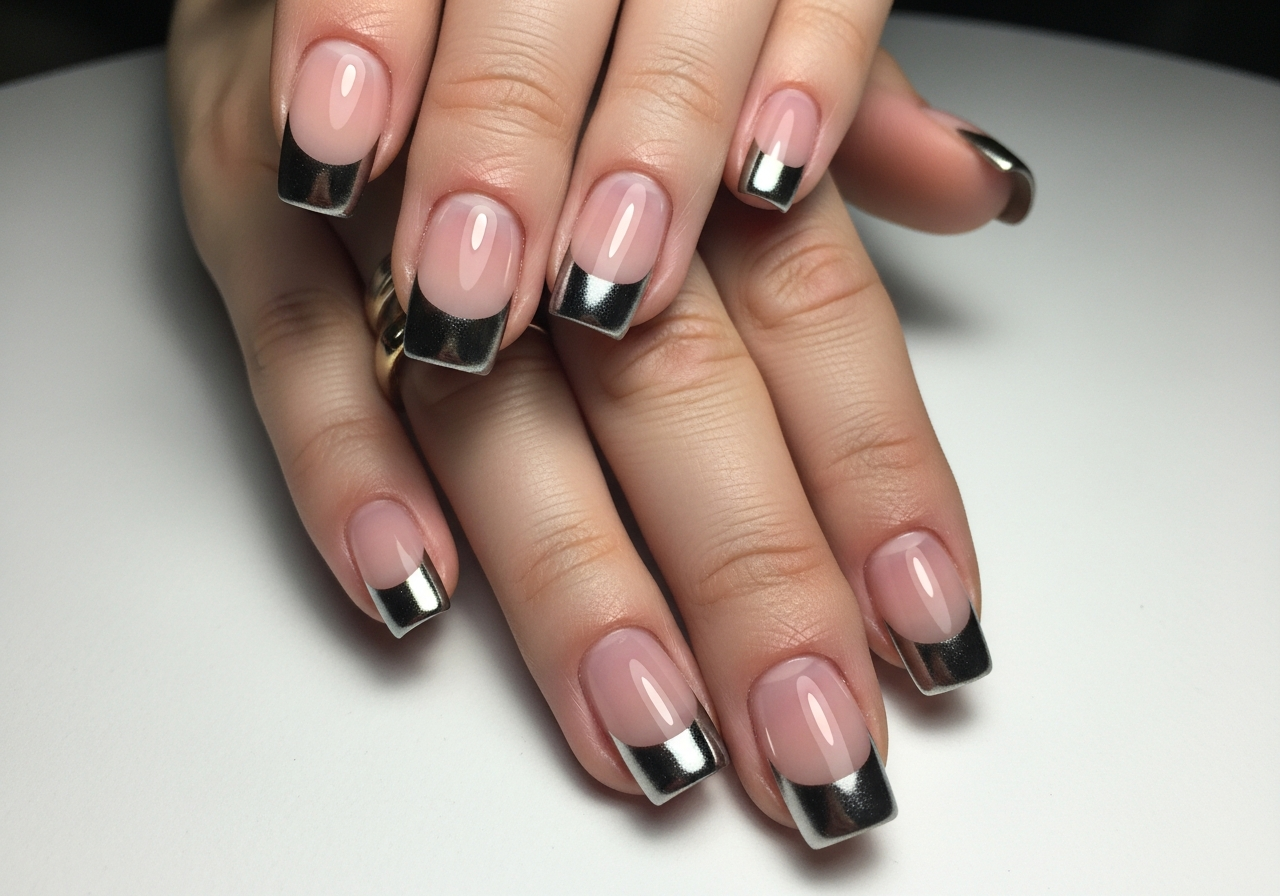
Chrome French Tips
This hybrid design combines the elegance of French manicures with the modern appeal of chrome finishes. Chrome powder applied only to nail tips creates focal points while allowing the natural nail bed to show through. The result feels contemporary yet refined, suitable for various New Year’s Eve settings.
Begin with a sheer pink or nude base color covering the entire nail. Apply a darker color to the tips, cure or dry completely, then apply chrome powder only to these tipped areas. The contrast between the subtle base and reflective tips creates definition without harsh lines typical of traditional French manicures.
Embellished Eve Nail Designs
Rhinestone Accents
Strategic rhinestone placement adds luxury and dimension that flat polish cannot achieve. These sparkling gems catch candlelight and party lights beautifully, creating focal points that draw attention. Rhinestone Eve Nail Designs range from minimalist single-stone accents to elaborate crystal patterns covering entire nails.
Application requires nail glue or a thick topcoat as adhesive. Place rhinestones using a dotting tool or tweezers while the adhesive remains tacky. Once positioned, allow complete drying before applying topcoat around but not over the rhinestones, as covering them dulls their sparkle. For special occasions like New Year’s Eve, consider professional application for intricate rhinestone Eve Nail Designs.
Pearl Embellishments
Pearls bring elegance and dimension to Eve Nail Designs while offering a softer alternative to rhinestone sparkle. Small pearl details placed at cuticles, scattered across nails, or positioned in specific patterns create sophisticated looks appropriate for formal New Year’s celebrations. The lustrous finish complements rather than competes with evening wear.
Secure pearls using the same technique as rhinestones but with consideration for their fragile nature. Smaller pearls work better than large ones for nail art, as they maintain better adhesion and proportion. Mixing pearl sizes within the same design adds visual interest and prevents monotony.
3D Bow Details
Three-dimensional elements create sculptural interest that elevates standard Eve Nail Designs. Small bows formed from gel or acrylic add feminine touches perfect for those embracing romantic or playful aesthetics. These dimensional details require more advanced skills or professional application but deliver impressive results.
Pre-made 3D bow embellishments offer easier alternatives to hand-sculpted versions. Attach these decorative elements using strong nail glue, positioning them carefully before the adhesive sets. Keep dimensional elements on one or two accent nails rather than all fingers to maintain practicality and prevent premature detachment.
Artistic and Abstract Designs
Marble Effect
Marble Eve Nail Designs create sophisticated patterns reminiscent of natural stone. The swirling effect typically combines white or nude bases with veins of gold, silver, or black. This artistic approach suits those wanting unique Eve Nail Designs that photograph beautifully while maintaining elegance appropriate for New Year’s celebrations.
Creating marble effects requires either water marbling techniques or strategic placement of thin polish lines that get blended with a fine brush before drying. For simpler application, marble nail wraps or stamps provide similar aesthetics without requiring artistic skills. Seal finished Eve Nail Designs with glossy topcoat to enhance the stone-like appearance.
Geometric Gold Lines
Clean geometric Eve Nail Designs featuring gold lines create modern, artistic manicures. Straight lines, triangles, or abstract shapes applied with gold striping tape or fine brushes deliver impact through simplicity. This approach appeals to minimalists who want festive elements without excessive embellishment.
Striping tape offers the easiest method for achieving perfectly straight lines. Apply base color, let dry completely, position tape in desired patterns, then seal with topcoat. For hand-painted lines, invest in quality striping brushes and practice steady hand techniques. Gold lines show beautifully against navy, burgundy, black, or nude base colors.
Confetti Scatter
Recreate the joyful chaos of dropped confetti through Eve Nail Designs featuring scattered glitter pieces in multiple colors and shapes. This playful approach captures the celebratory spirit while allowing creative freedom. The randomized placement means imperfect application actually enhances the overall effect.
Apply a neutral base color, then while slightly tacky, use tweezers or a dotting tool to place individual glitter pieces in random patterns. Mix shapes and sizes for authentic confetti appearance. Alternatively, specialized confetti glitter suspended in clear polish simplifies application while achieving similar results. Multiple topcoat layers smooth the textured surface.
Seasonal and Thematic Designs
Firework Bursts
Capture the explosive beauty of fireworks through nail art featuring radiating lines and glitter bursts. These Eve Nail Designs typically use black or navy bases with gold or silver lines extending from central points, often topped with glitter for added sparkle. The dramatic effect suits those wanting nails that make bold statements.
Create firework effects by painting a dark base, then using a fine brush to paint radiating lines from a central point on each nail. Add dimensional interest by applying glitter to line endpoints, suggesting the sparkling burst of actual fireworks. This design requires artistic confidence but rewards effort with stunning results.
Midnight Clock Countdown
Commemorate the iconic countdown with nail art featuring clock faces set to nearly midnight. This literal interpretation of New Year’s Eve creates conversation-starting Eve Nail Designs perfect for photography. The detailed nature typically requires steady hands or professional application but delivers memorable results.
Paint base colors, allowing complete drying, then use fine detail brushes to create clock faces. Roman numerals, standard numbers, or simple tick marks all work depending on artistic skill level. Position hands at 11:59 or midnight for thematic accuracy. Seal completed Eve Nail Designs with quality topcoat to prevent smudging of fine details.
Champagne Glass Silhouettes
Celebrate the traditional midnight toast through nail art featuring champagne glass silhouettes. These elegant Eve Nail Designs work on accent nails or across entire manicures. The sophisticated imagery suits formal celebrations while maintaining playful festivity appropriate for New Year’s Eve.
Create these Eve Nail Designs through hand-painting or stamping techniques. Gold outlines of champagne flutes against nude or black bases create striking contrast. Add small bubbles above glasses using dotting tools and white or gold polish for added detail. This design works particularly well on longer nail lengths that accommodate the vertical glass shape.
Practical Application Tips
Preparation Matters
Proper nail preparation determines manicure longevity regardless of design complexity. Begin by removing all existing polish completely, then file nails to desired length and shape. Push back cuticles gently, removing any excess skin that might interfere with polish adhesion. Buffing the nail surface lightly creates texture that helps polish grip better.
Clean nails thoroughly with alcohol or acetone to remove oils and debris. This crucial step ensures maximum adhesion and prevents premature lifting. Apply a quality base coat designed for your chosen polish type, allowing complete drying before proceeding. These preparatory steps add time but significantly extend wear duration.
Layer Building Technique
Professional-looking results come from building color through multiple thin layers rather than single thick applications. Thin coats dry faster, level better, and prevent the bubbling and pooling that plague thick polish applications. This principle applies to all polish types, from standard lacquer to gel formulas.
Apply the first coat sparingly, covering the nail without concern for full opacity. Allow partial drying, then apply additional thin coats until achieving desired color depth. Most designs require two to three color coats. Rushing between coats causes smudging and extends total drying time, so patience proves essential.
Sealing for Longevity
The final topcoat application protects underlying designs while adding shine and extending wear time. Choose topcoats formulated for your specific polish type, as mismatched products can cause lifting or dulling. Apply topcoat not just across the nail surface but also along the free edge, sealing the tip where chipping commonly begins.
For designs incorporating glitter or embellishments, consider applying two topcoat layers. The first encapsulates particles and smooths texture, while the second adds protective shine. Allow each layer to dry completely before applying the next. Reapply topcoat every two to three days to maintain shine and prevent premature wear.
Maintenance and Care
Protecting Your Investment
New Year’s Eve manicures deserve protection to ensure they survive midnight celebrations and beyond. Wear gloves when doing dishes or cleaning to prevent exposure to harsh chemicals and water. Apply cuticle oil daily to maintain flexibility and prevent polish cracking around cuticle areas. These simple habits significantly extend manicure lifespan.
Be mindful of activities that stress nails, such as opening cans or typing vigorously. Small behavioral adjustments prevent chips and breaks that compromise the overall appearance. For gel manicures, avoid picking at lifting edges, as this damages the natural nail beneath. Professional removal always proves safer than DIY attempts.
Emergency Repair Solutions
Despite best efforts, chips and breaks sometimes occur during celebrations. Keep a small bottle of topcoat in your evening bag for quick fixes. A layer of topcoat over small chips temporarily conceals damage until proper repair becomes possible. For rhinestone loss, clear nail glue provides temporary reattachment.
If a nail breaks during celebrations, file the remaining length smooth and apply polish to the exposed area. For severe breaks, press-on nails color-matched to your design offer temporary solutions. Many drugstores sell individual artificial nails that can rescue compromised fingers without requiring full manicure replacement.
Professional Versus DIY
When to Visit the Salon
Certain Eve Nail Designs exceed typical DIY capabilities and warrant professional application. Intricate hand-painting, elaborate rhinestone patterns, and advanced techniques like ombre or marble effects often look significantly better when executed by trained technicians. For New Year’s Eve celebrations where appearance matters, professional application ensures flawless results.
Gel manicures particularly benefit from professional handling, as proper curing and application technique prevent lifting and ensure maximum longevity. The investment in salon services pays dividends through extended wear time and superior appearance throughout holiday festivities. Book appointments well in advance, as salons fill quickly approaching New Year’s Eve.
Successful At-Home Application
Many Eve Nail Designs featured here suit DIY execution with proper tools and patience. Stock your home manicure station with quality base coats, polishes, topcoats, and tools like striping brushes, dotting tools, and nail guides. Investing in proper supplies elevates results significantly compared to using makeshift alternatives.
Practice new techniques before the actual event to build confidence and refine skills. Watch tutorial videos for visual guidance on complex methods. Remember that even professionals required practice to master their craft, so allow yourself grace during the learning process. Simple Eve Nail Designs executed well outshine complex attempts that fall short.
Choosing Your Perfect Design
Consider your personal style, outfit choices, and celebration plans when selecting from these twenty-five Eve Nail Designs. Formal galas suit sophisticated options like metallic French tips or subtle chrome finishes, while casual house parties permit bolder choices like full glitter coverage or dramatic color combinations. Your comfort level with attention-grabbing designs should guide final selection.
Hand shape and nail length also influence design suitability. Shorter nails showcase solid colors and simple accents effectively, while longer lengths accommodate intricate details and dimensional embellishments. Skin tone affects how colors appear, with warm undertones favoring gold and rose gold while cool undertones suit silver and platinum shades.
Most importantly, choose Eve Nail Designs that spark joy and boost confidence. New Year’s Eve celebrates new beginnings, and feeling beautiful in your own skin contributes significantly to enjoying the occasion. Whether you select understated elegance or bold glamour, let your manicure reflect your personality and intentions for the coming year.
Conclusion
New Year’s Eve nail designs offer more than mere decoration. They represent personal expression, attention to detail, and commitment to celebrating life’s significant moments with style. The twenty-five Eve Nail Designs presented here span the spectrum from timeless classics to cutting-edge trends, ensuring options for every aesthetic preference and skill level.
As you prepare for New Year’s celebrations, remember that perfect nails enhance confidence and complete your carefully curated look. Whether you choose the mirror-like shine of chrome finishes, the playful sparkle of glitter gradients, or the sophisticated elegance of metallic French tips, your manicure becomes part of your celebration story. The time invested in creating beautiful nails pays dividends through the joy of catching glimpses of your own hands throughout the evening and seeing them featured in photographs commemorating the occasion.
Welcome the new year with nails that reflect your hopes, dreams, and personal style. Let these Eve Nail Designs inspire creativity while providing practical guidance for execution. From the first planning stages through the final topcoat application and ultimate midnight celebration, may your manicure bring you happiness and confidence as you step forward into new beginnings.